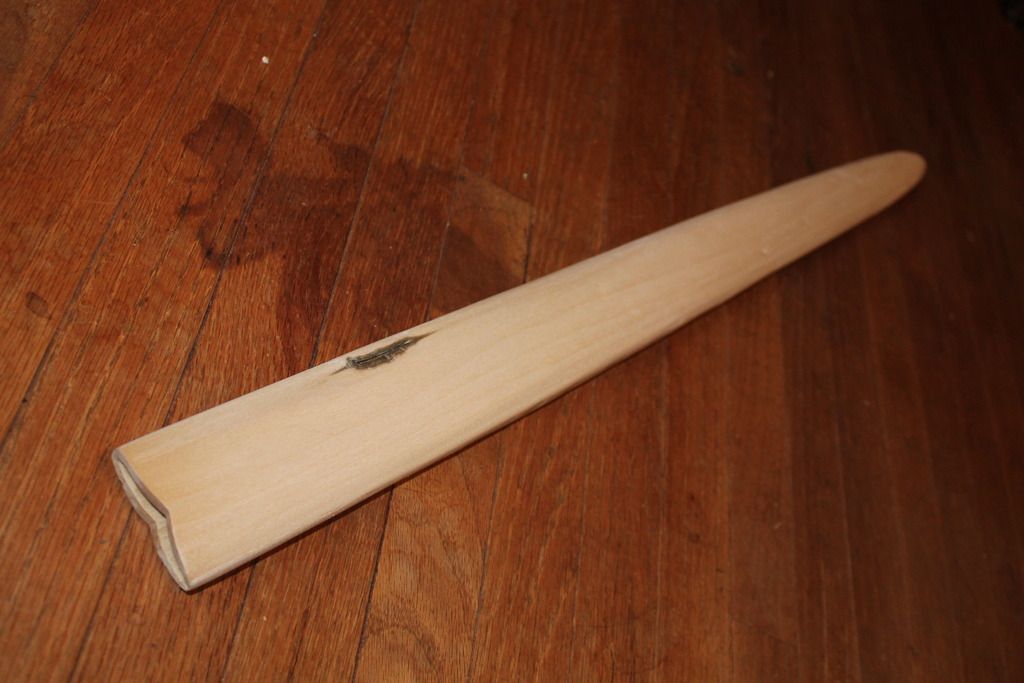
First I tried to get a friend (and local SCA baron) to make me a wooden scabbard core, but alas, the scabbard he made didn't fit correctly, so I was unable to use it. Instead, I turned to our very own Greg to fashion me one out of poplar. I sent my sword out to him in Indiana, wedged as best as I could get it into the original scabbard core. Briefly after Greg received the sword he sent me this picture, showing his excellent re-purposing of that core, heh:
After a brief wait, due to he and his family being busy as all hell in preparation for their upcoming move, etc, the sword and the new scabbard arrived at my front door, and I was ready to begin!
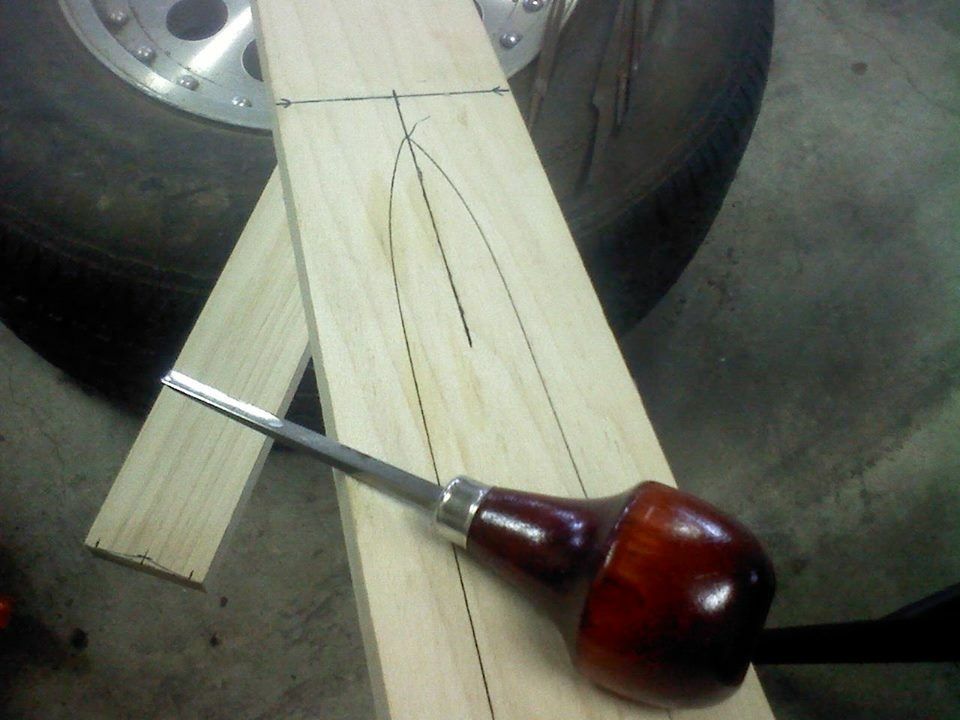
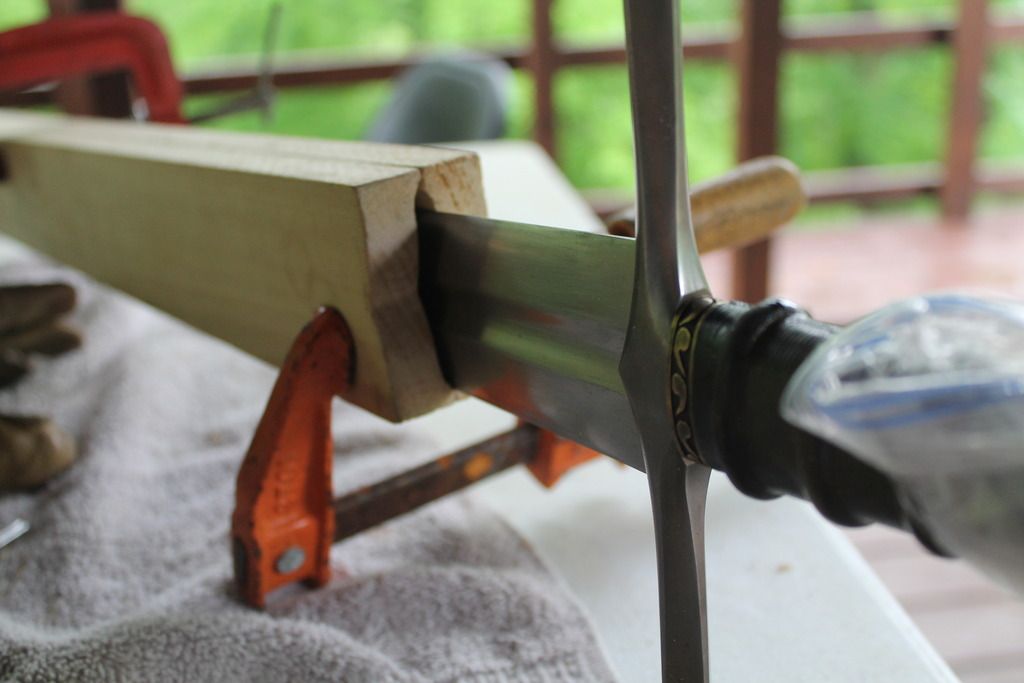
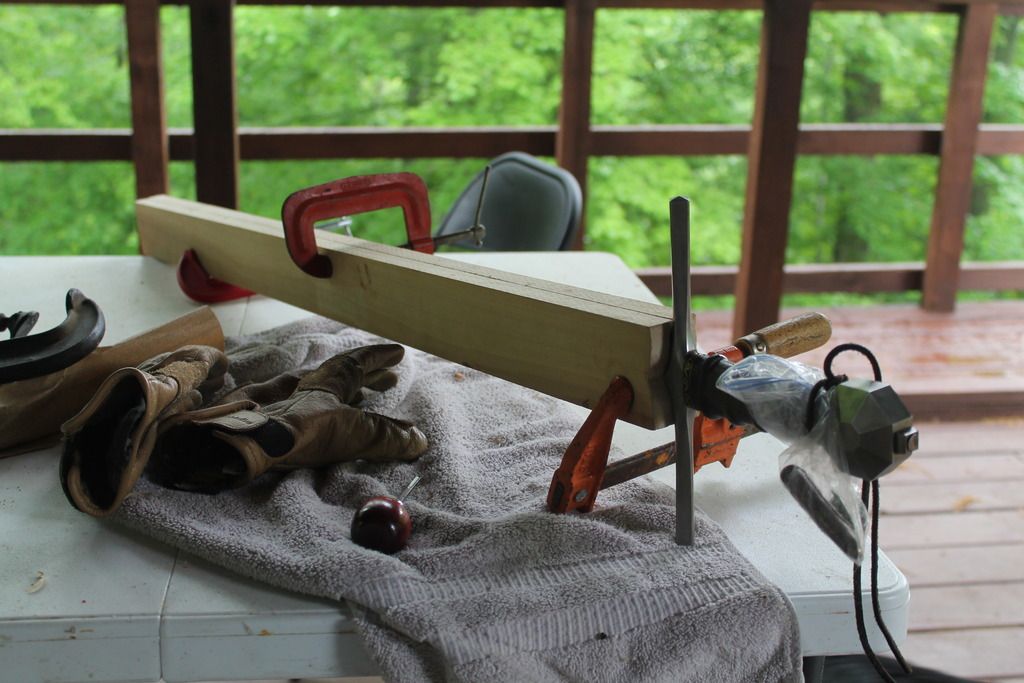
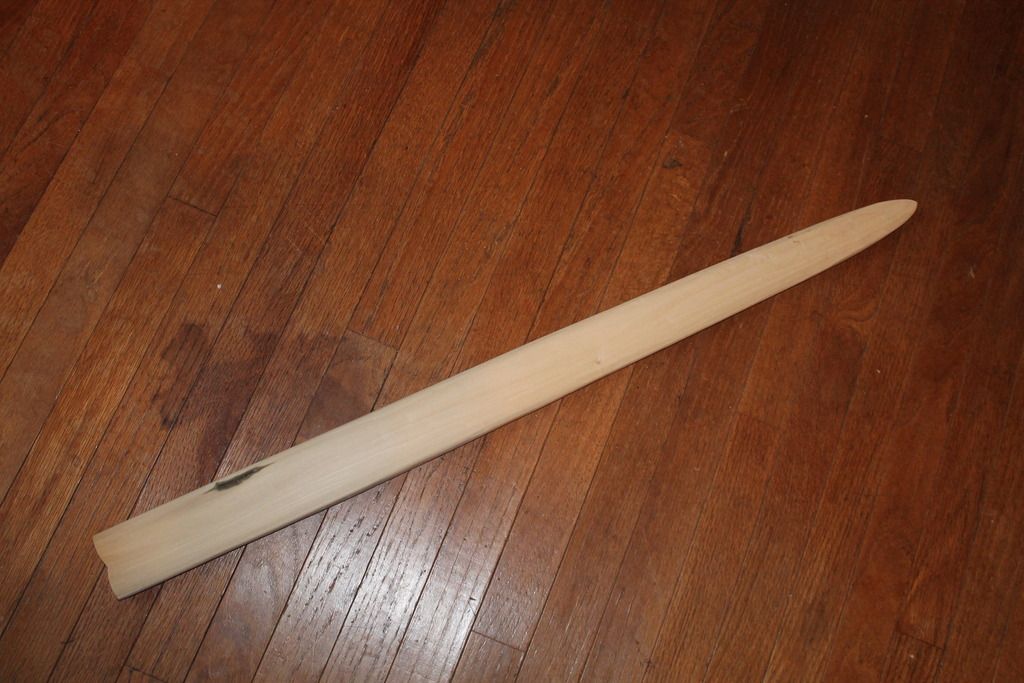
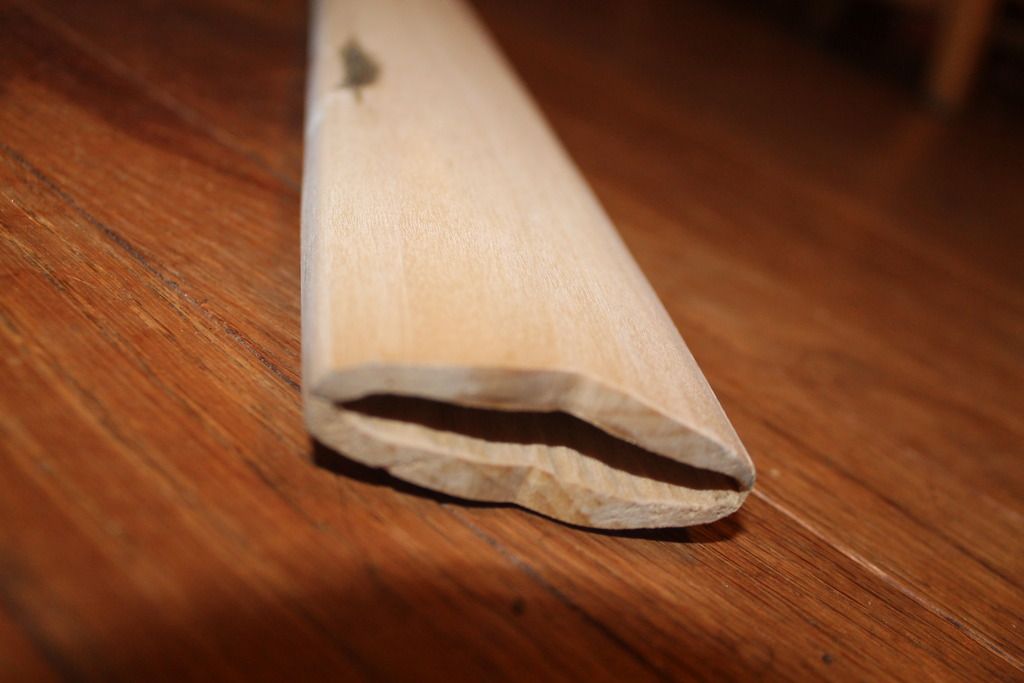
The scabbard itself is beautifully made, in a period-correct fashion, out of two pieces of wood with the inside carefully carved out to fit the sword. Greg designed it to be slightly convex on the front of the scabbard, and more flat on the back, so as to lay against my hip better, which was a design element I appreciated. There was a slight blemish on the front side of the scabbard, which Greg explained was probably from the tree being scorched at some point during its growth, but I kind of liked it, as I thought it gave the scabbard a bit of character, and besides, I was planning on covering the whole thing with leather in any case. Below are some pictures Greg sent me of the building process.
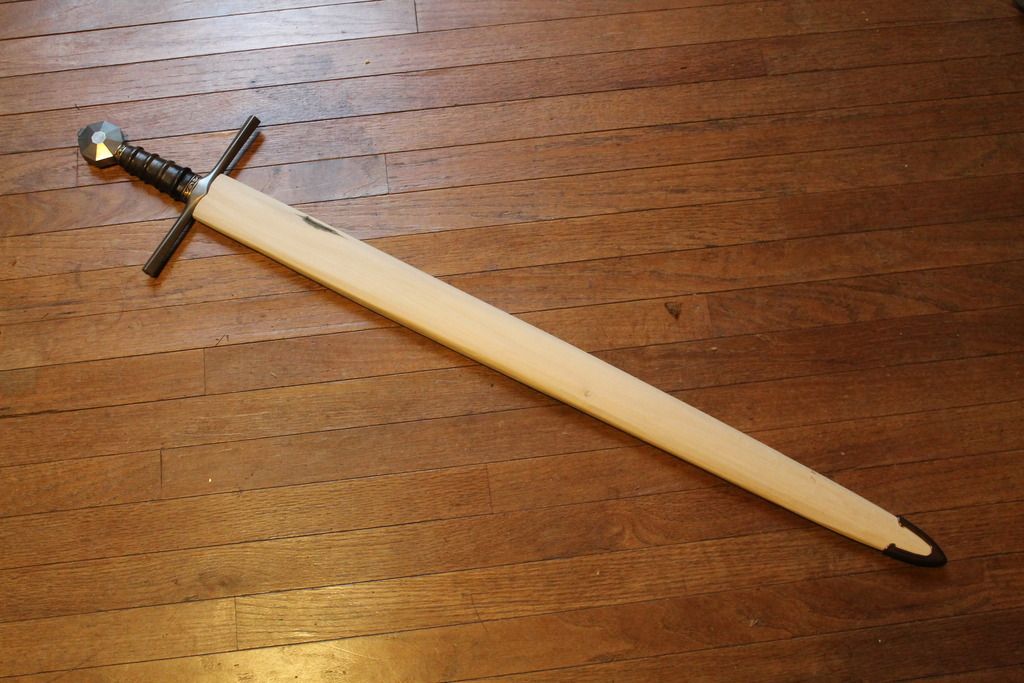
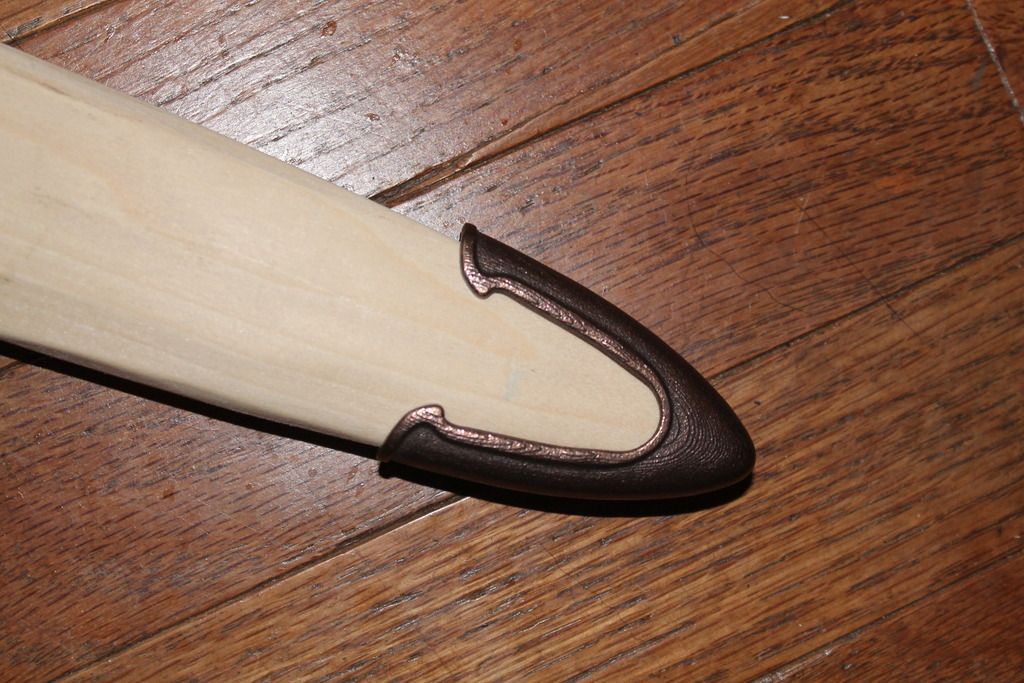
The last one shows how well he fitted the scabbard to my chape from Christian Fletcher (one of the 3-D printed products from his Shapeways store, which I highly recommend checking out). The chape fits perfectly!
So yes, I was extremely pleased with the scabbard! It was obviously crafted with care and no small amount of skill, and it fits the blade like a glove! It doesn't quite hold the blade fast if turned upside down, but both Greg and I agree that we're not necessarily huge fans of that anyway. My only two criticisms of the scabbard when it arrived were that there was one spot along one of the edges that was still just a tad square-ish (but this was easily rounded out with a light pass-over with an electric sander), and that one side of the mouth of the scabbard was carved just a tad thinner than I might have liked. This latter issue probably wasn't a very big deal, but I glued a tiny little piece of leather inside the mouth of the scabbard, directly over that spot, just in case, since I knew the blade would be rubbing against it repeatedly every time the sword was drawn and re-sheathed. This also served to snug up the fit just a little bit. Overall, I was exceedingly happy with his work, and I highly recommend hitting him up next time you're looking for something of the like!
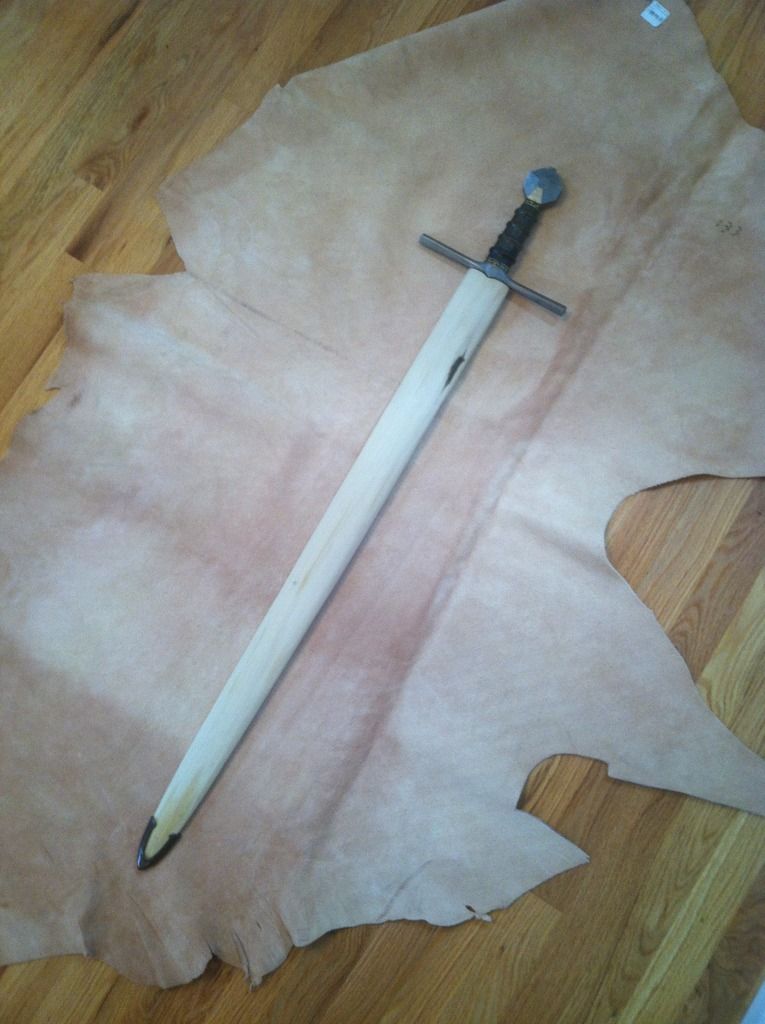
Here is the scabbard right when it arrived, laid on top of the piece of leather I bought to wrap it:
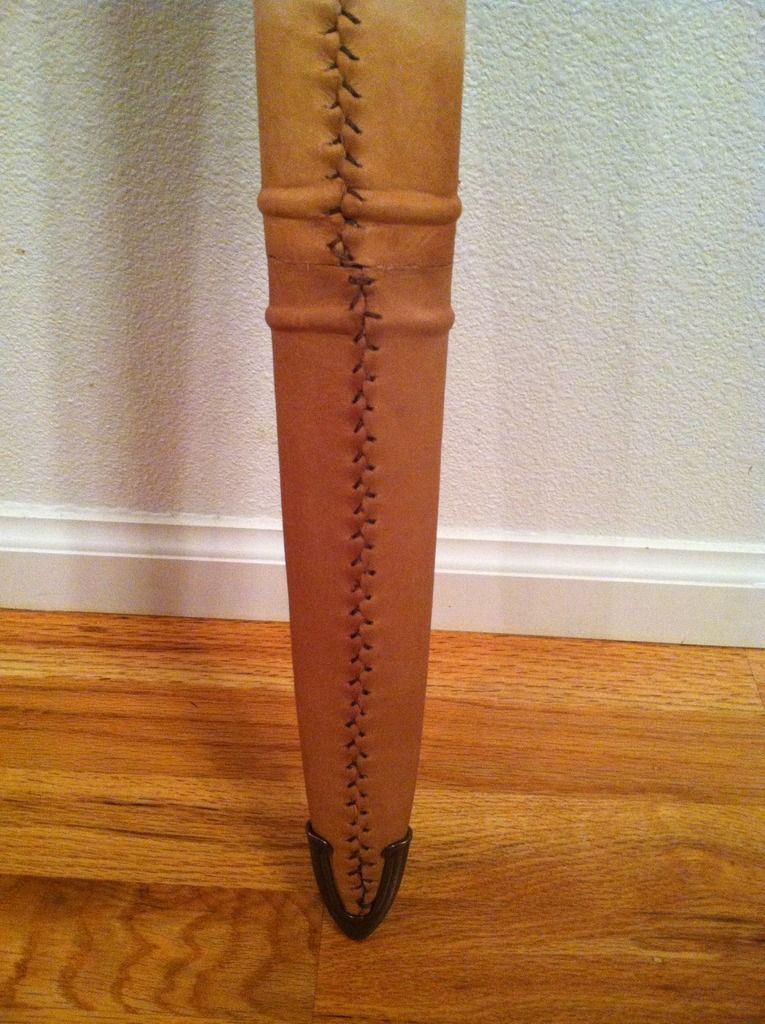
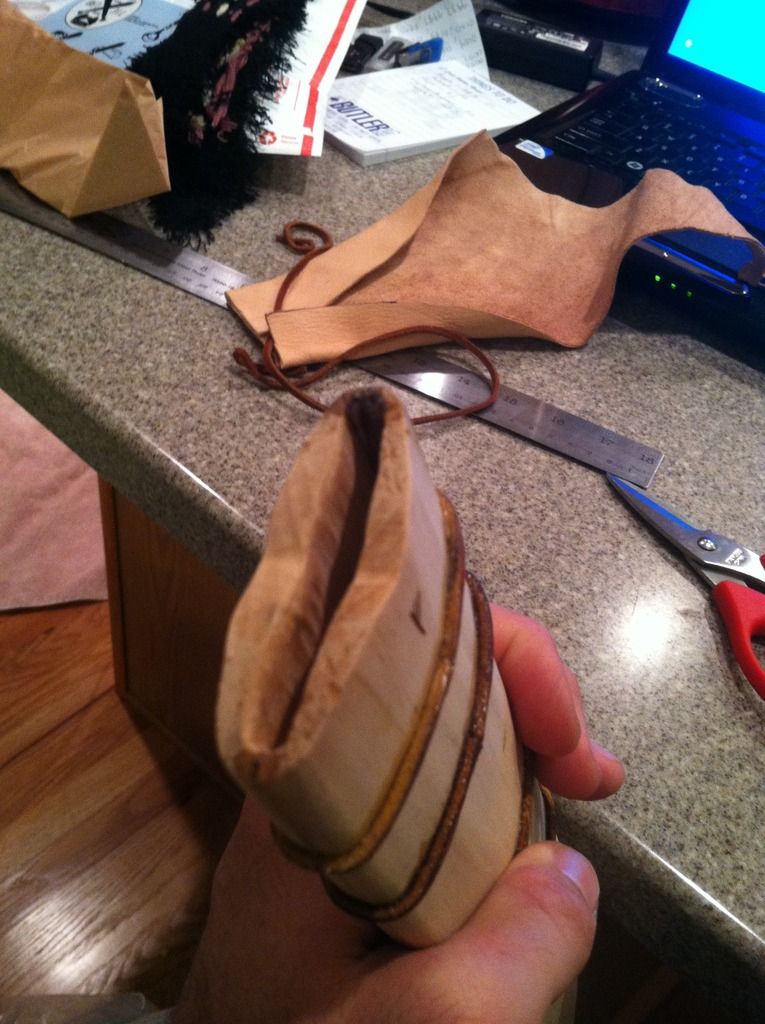
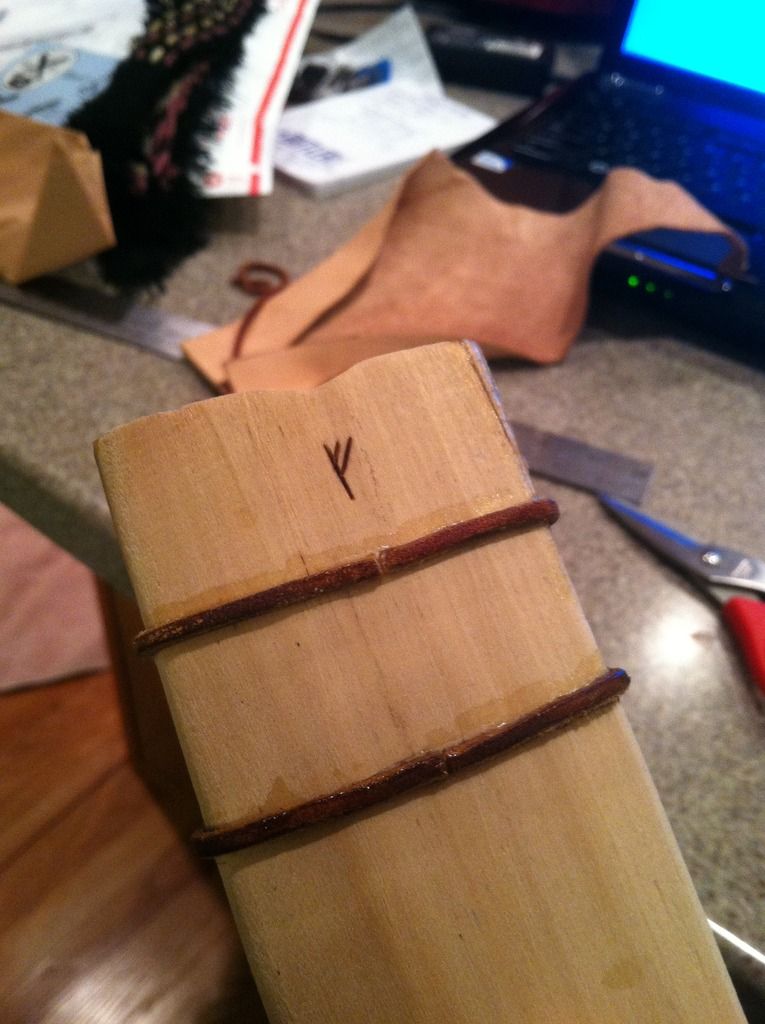
The first step after getting the scabbard was to glue on pieces of leather lace for the risers, which can be seen here:
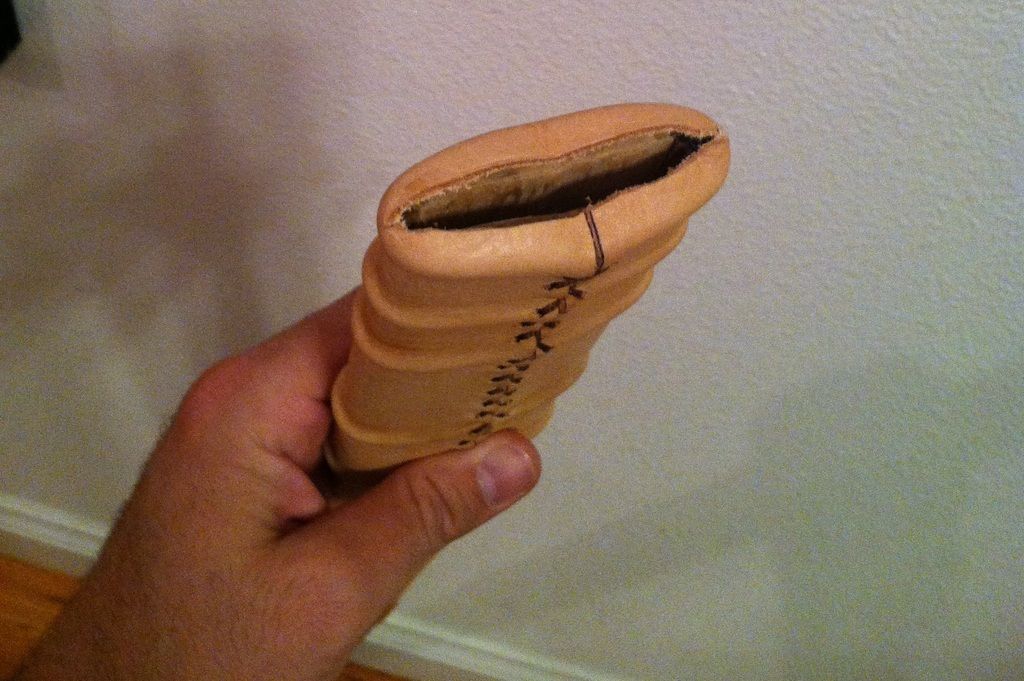
Below are a couple shots of the mouth of the scabbard, before I glued on the third riser at the top. The one looking down the mouth also shows the small piece of leather I glued just inside (although it's a bit blurry). You can also see Greg's "G" rune makers mark in some of these pictures - which I love, not only because it's a nice reminder of Greg's excellent work, but also because it reminds me of Gandalf, heh.
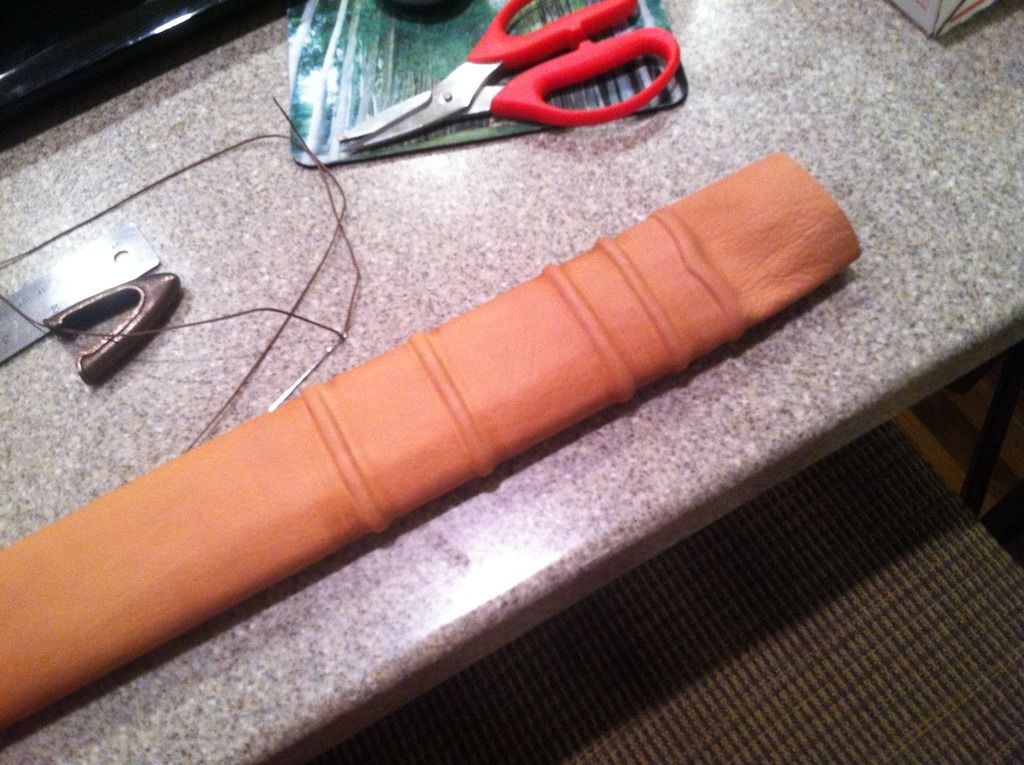
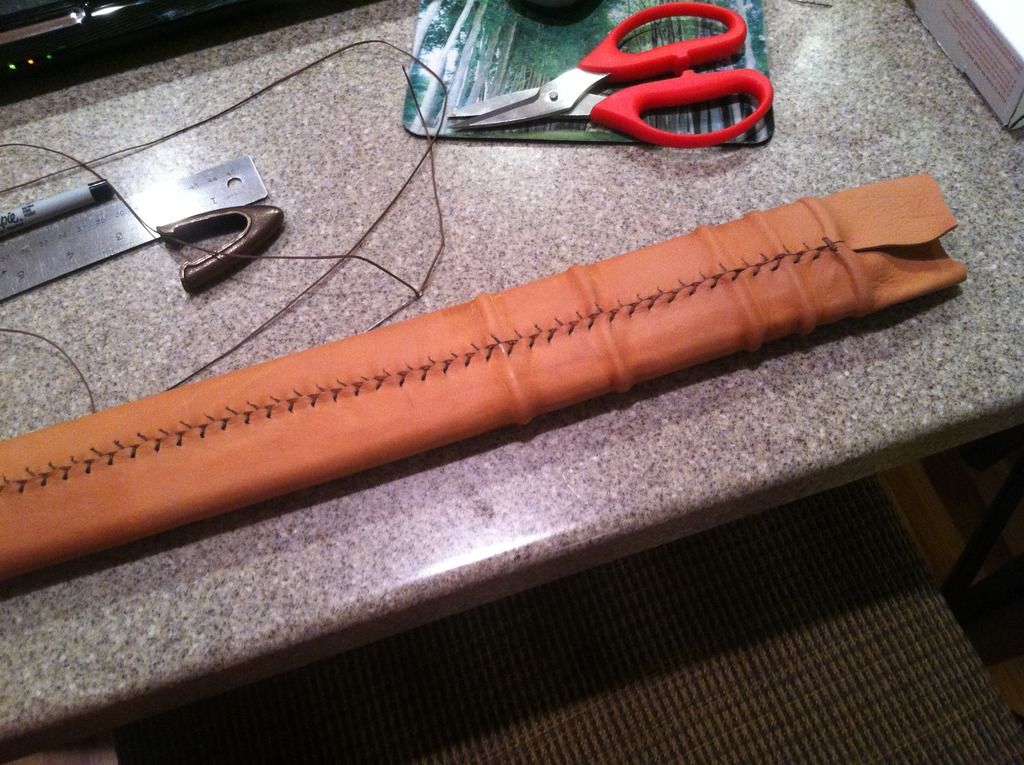
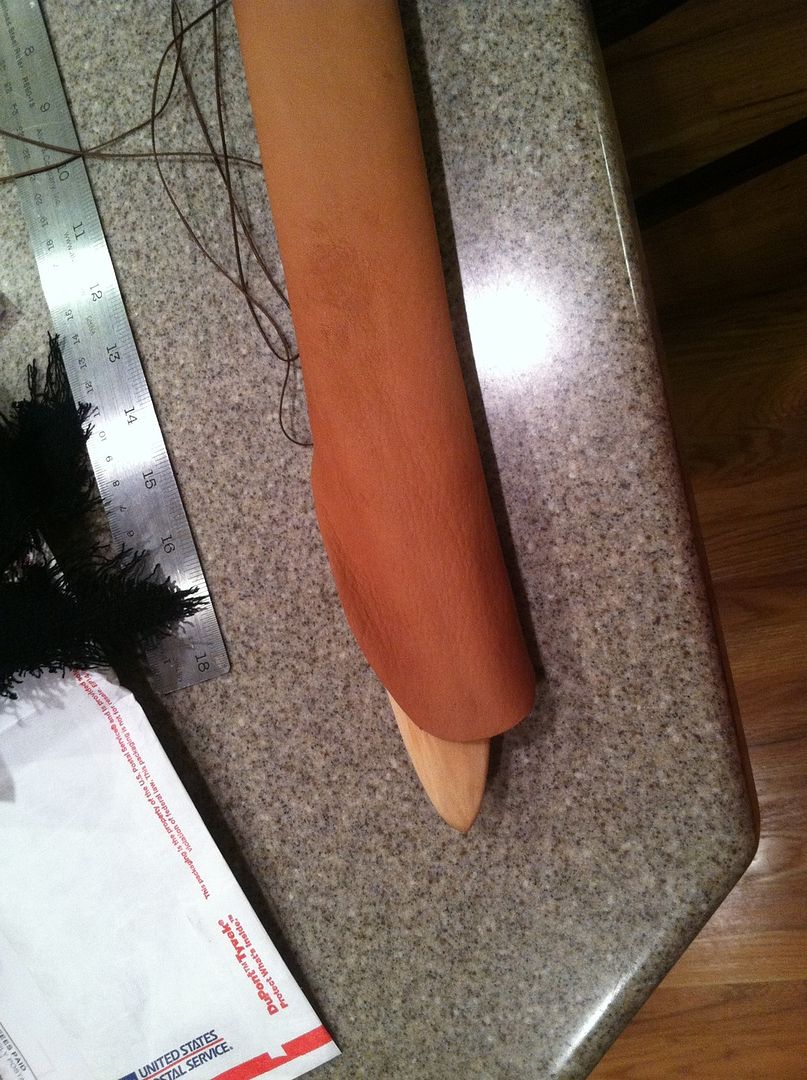
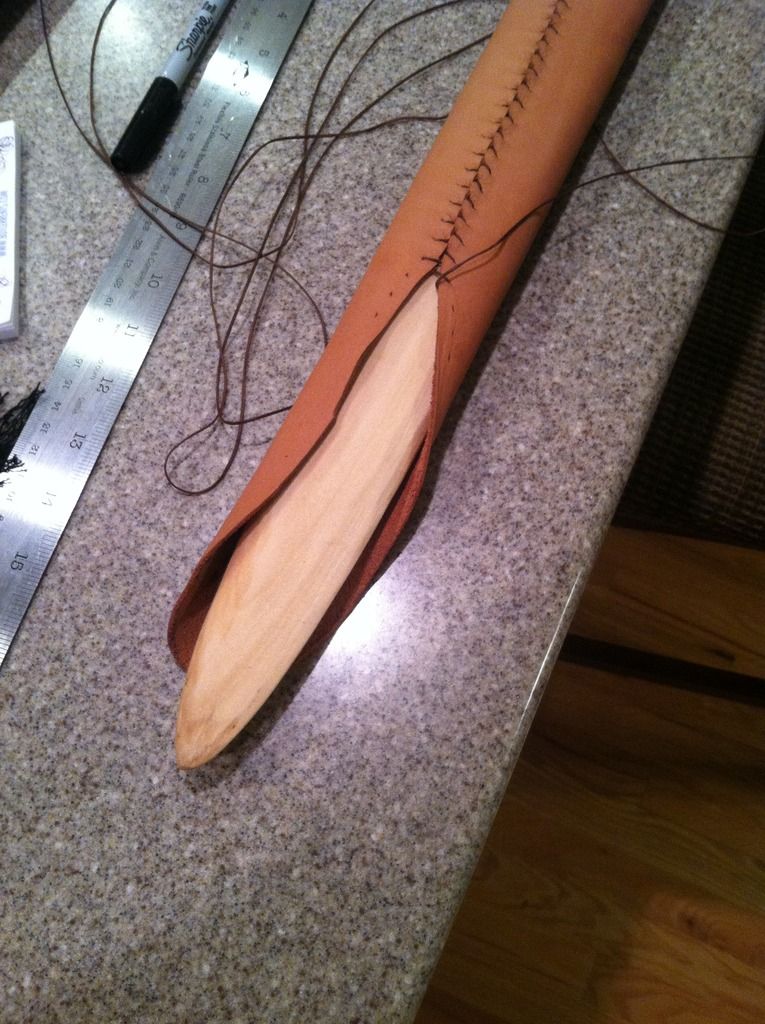
After this, I measured the scabbard around several points, and then I cut a long, rectangular strip of leather with which to wrap it. Unfortunately, after wetting the leather and attempting to stretch it around the scabbard, I discovered that I had measured just a touch too small, and I was forced to cut another strip and start again - good thing I bought enough! This time I stretched it around the core, over the risers, and then bound it with artificial sinew in order to mold it closely to the shape of the risers. My idea, at the time, was to get the risers molded in, then take the leather off and have a friend do some carving and tooling on it for decoration, and finally to put it back on the scabbard and sew it on permanently. Unfortunately, I discovered quickly this was not very feasible, as the leather lost it's shape significantly after being taken off the core (even once it had dried), so I simply re-wet it and began actually sewing it on, using a "baseball" stitch.
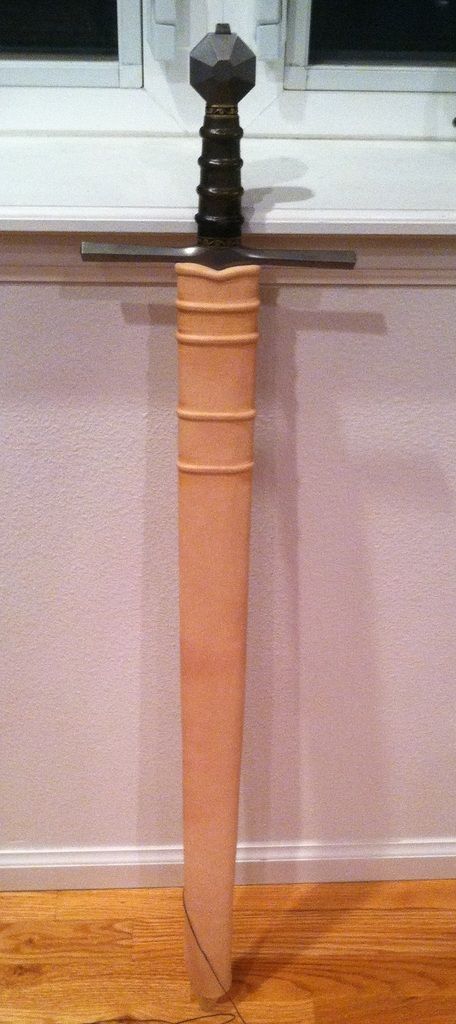
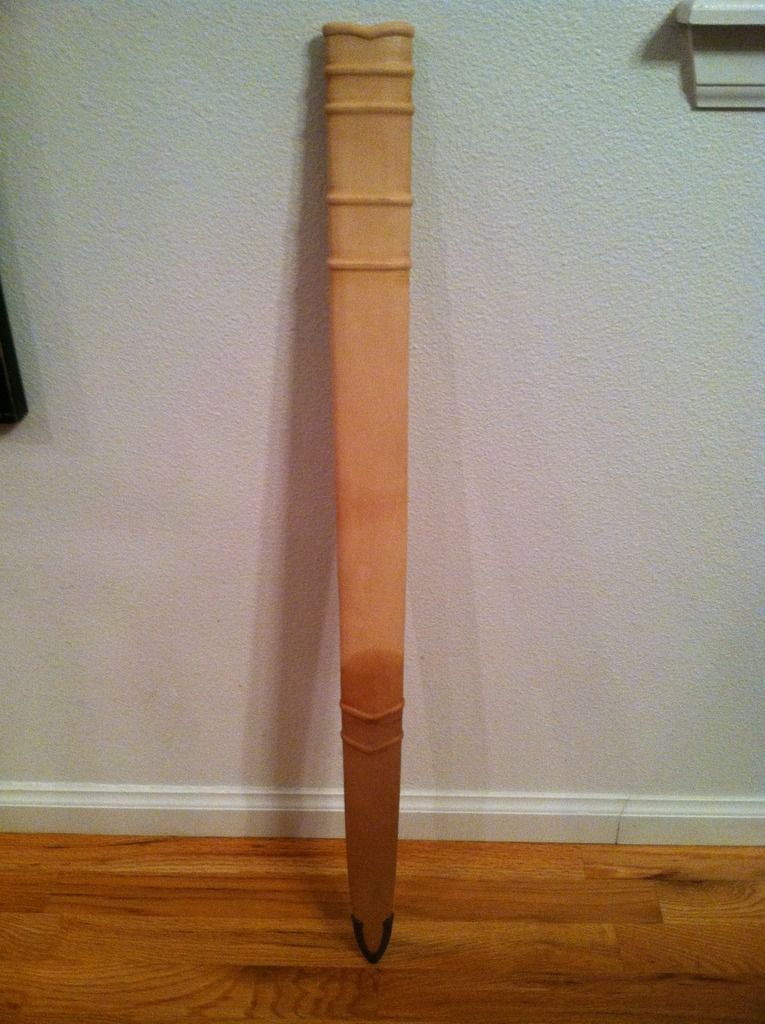
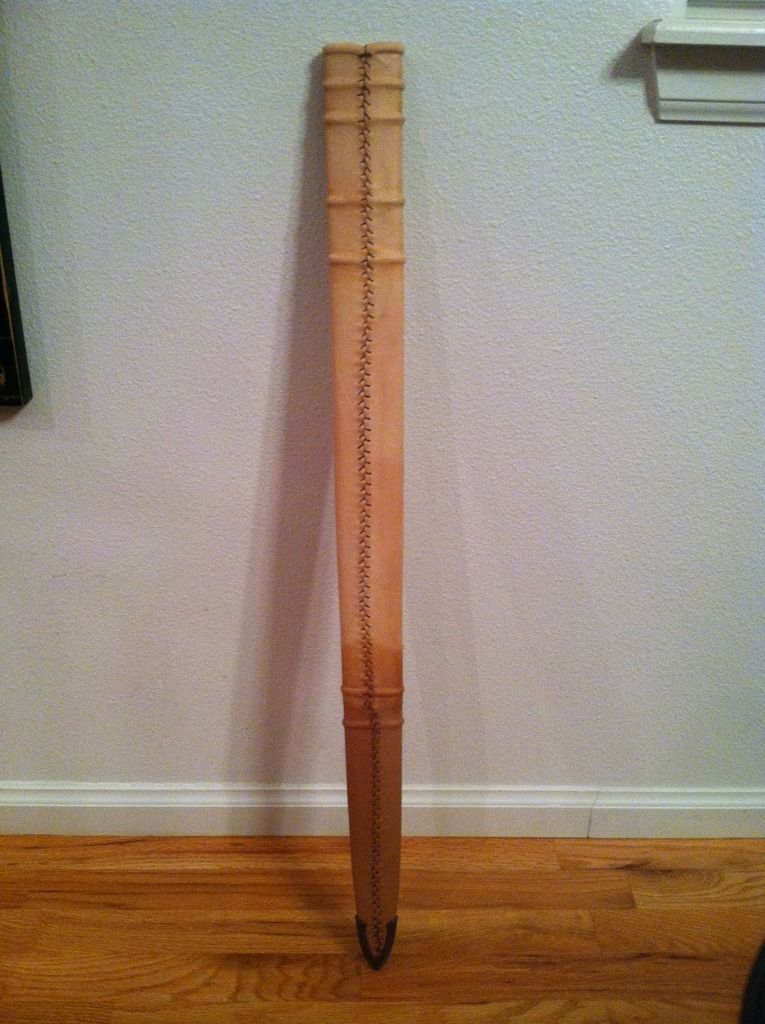
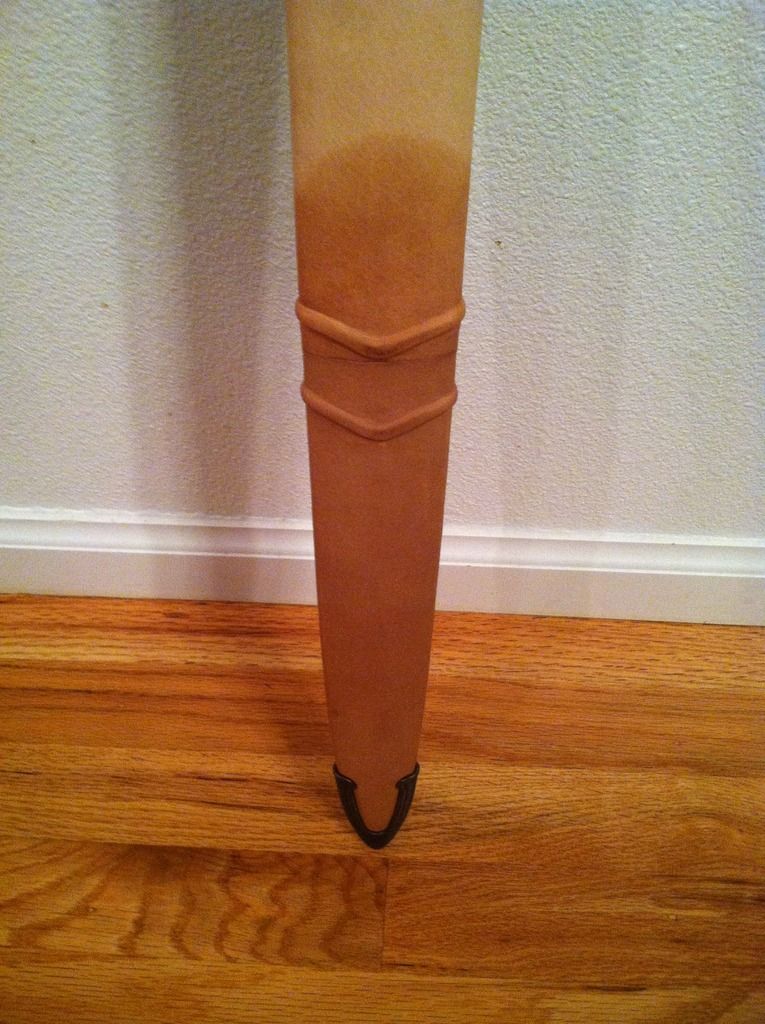
Mind you, this IS my first time ever doing a scabbard like this - and as such, my work turned out... well, amateur-ish. The seam up the rear of the scabbard, in particular, turned out incredibly crooked. I fought and fought with that damn seam, but I just couldn't get it to lay straight to save my life. It's still a total mystery to me how anyone does, but I guess that comes with practice. I made one other big mistake, in that I trimmed too much off the end of the leather strip, towards the bottom of the scabbard. I measured it exactly to the end of the scabbard, but neglected to consider the fact that the stitching caused the whole thing to shrink up just a tad, becoming shorter and shorter as I stitched. In the end, the end of the leather worked its way so far up the scabbard that it became too narrow, and wouldn't even stretch around it as I sewed, so I didn't have any choice but to cut the end off and splice it. This was probably my biggest failure, but I had the idea to glue two more risers onto the core - one on either side of the splice - and when I get the chance I'm going to cut a piece of sheet-brass to the exact shape of the area within those risers, and cover the splice with it. I'm also planning to make a matching brass band for just below the throat of the scabbard, to tie the whole design together. In the end, I think it's going to look awesome, so I'm trying to see it as a lemons-to-lemonade sort of situation, haha. Lastly, I had intended to make a triangular rain-flap a the top, like most scabbards of the early Medieval period, but as the wet leather began to form around the mouth of the scabbard core, I decided I liked the shape it was making, so I added another riser directly at the mouth, formed the leather around it, and trimmed it to fit. It's a bit of a later period look, but I really like the way it turned out.
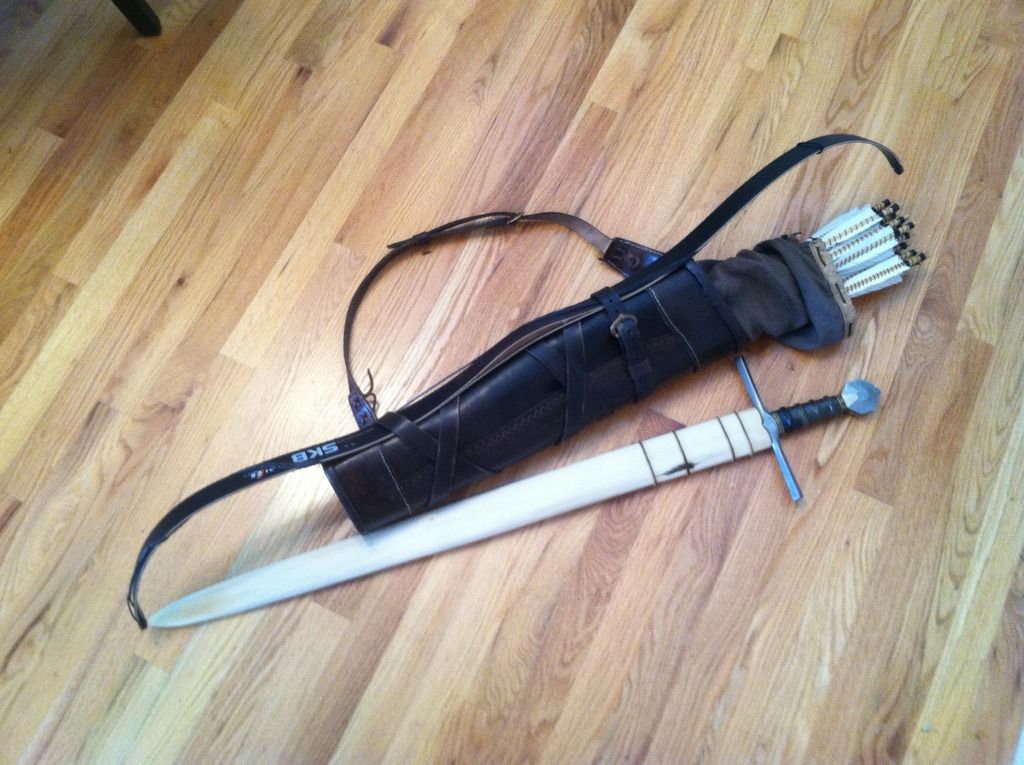
The rest of the pics are below. Still a lot of work to to yet (I just got the straps to make the interlaced belt system today), but hopefully I'll have more to share soon!