Heath Briar Tobacco Pipe (Tute Added)

A lot of reenactment level work is about learning appropriate historical crafts and skills. This board is for all general skills that don't have their own forum.

Moderators: caedmon, Greg

Post Reply
User avatar
Brendan Olszowy
Wayfarer
Posts: 13
Joined: Sat Feb 27, 2010 11:32 pm
Location: Western Australia
Contact:

Heath Briar Tobacco Pipe (Tute Added)

Post by Brendan Olszowy »

Made a pipe for a mate yesterday. Does anyone else here make their own pipes? If so what materials and methods have you used?
If you haven't it's really not hard with some basic tools - you should consider trying it if it's something that grabs your fancy. I can offer a simple tute of how I make them if you like? All you'd need is a drill press (or even a drill) and a little beltsander. (Edit - Tute added below)

Matey said he wanted to make a Sherlock Holmesey one, though I inadvertently bring an Elvish flair to everything I do :). This is the second one I've made from the Heath Briar Burl which is the #1 recommended pipemaking wood. Though I've made several from other woods. Definitely the Heath tastes and feels by far the best to smoke from out of the ones I've made. And it's a spectacular wood to work with - so dense and creamy, with no grainy splintering at all. It's fantastic stuff, and very beautiful. Anyway I went and visited him last night and we packed a few bowls of Peterson's Sweet Killarney and she went great.

I've found this 3/8" brass tube solves any problems for stems - it works really well, and bends easily round some pipe with some force. It allows for some pretty funky designs and a nice long cooling passage.
I allow for a filter to be added in my mouthpieces by drilling them with a stepped three stage passage - 9.1mm for the stem, then a 6.6mm cavity for the filter, and finally reducing to a 4.7mm outlet. Though this pipe smoked so smooth and cool one ought not choose to use a filter.

Out of all the Australian woods I have read that Malley Root Burl is the best pipewood, and I have a nice little piece here which I'll try someday soon, and see how it compares.

So how bout you folk, anyone else dabbled in pipemaking?

Image
Image
Last edited by Brendan Olszowy on Sun May 30, 2010 5:13 pm, edited 2 times in total.
User avatar
Brendan Olszowy
Wayfarer
Posts: 13
Joined: Sat Feb 27, 2010 11:32 pm
Location: Western Australia
Contact:

Re: Heath Briar Pipe

Post by Brendan Olszowy »

Here are some other's Ive made for my mates and I:

This one is the other Heath Briar Burl one - and my personal:
Image
This one was a wedding gift for friends - made out of Acacia Blackwood - it was the first pipe I made:
Image

This one is Sheoak. It's a Beatiful wood grain but prone to cracks:
Image
Image
And this one's Red Morrell burl - a Eucalypt found out in the Goldfields:
Image
kaelln

Re: Heath Briar Pipe

Post by kaelln »

I once made a smokable pipe from ceramic. It looked like something the caterpillar from Alice in Wonderland would smoke, but it had two problems. One, it was too fragile, and wound up being broken several times, and two, it got too hot to hold.

I've thought about trying my hand at pipemaking again, even though I no longer smoke at all, just because part of me thinks a Ranger "should" have a hobbitty looking pipe. Heck, I never did smoke more than an occaisional pipe or cigar, so pipes haven't been high on my list. But I did wonder how a cattail stem, also known as a "bullrush" stem might work. We have those growing off the side of the road. What's your source for the burl?

Nice looking pipes! You're right, you do have an elvish flare!
kaelln

Re: Heath Briar Tobacco Pipe

Post by kaelln »

A tutorial would be most welcome!
R.D.Metcalf
Amrod Rhandir
Posts: 635
Joined: Sun Jun 28, 2009 7:39 pm
Location: The wild Hielands of Western N.C.

Re: Heath Briar Tobacco Pipe

Post by R.D.Metcalf »

Awesome work, Brendan!
The frontier moves with the sun and pushes the Red Man of these wilderness forests in front of it... until one day there will be nowhere left. Then our race will be no more, or be not us.

My Sword Is my Troth.

~Iron Wolf Forge~
User avatar
Brendan Olszowy
Wayfarer
Posts: 13
Joined: Sat Feb 27, 2010 11:32 pm
Location: Western Australia
Contact:

Re: Heath Briar Tobacco Pipe

Post by Brendan Olszowy »

G'day Kaelln
Yeah I am not a big smoker either. Maybe once a week does it for me (though I smoked more as a youngun). Not being much of a smoker I hate the smell of cigarettes. But this Peterson's Sweet Killarney is like creme caramel. Very tasty to a sweet tooth like me.

Before I made my first one I looked into ceramic but I certainly was concerned about durability. I didn't know they heat up so bad though. Never tried one.

I bought my Heath Briar from this chap: http://www.amsmoke.com/
Very reasonaby priced and reliable service. You can also search ebay.

I read another site where the bloke tried Walnut and a list of other woods but it looks like his page is down now or I'd link to it. He assessed a heap of them. I do remember he was very keen on the apple, and did like the walnut.
ahhh, here it is, just archived: http://www.naspc.org/Archives/otherwood.html
User avatar
Brendan Olszowy
Wayfarer
Posts: 13
Joined: Sat Feb 27, 2010 11:32 pm
Location: Western Australia
Contact:

Steps in Making my pipes - Tute

Post by Brendan Olszowy »

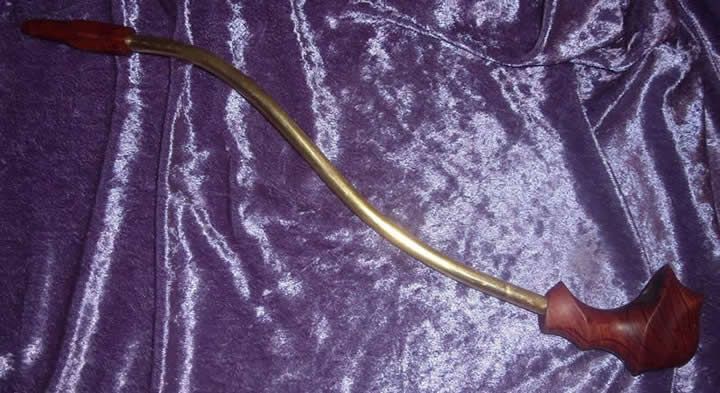
Bear with me on the tute. I might make this Malley Root one and take some pics as I go...
1. Basically though you get your block (plateau), plan the overall shape which will be largely dicatated by what you like and what your block will allow. Draw the side profile roughly on the block.

2. Plan the angle of the bowl and the outlet passage. Draw or scribe the centre line for these holes, and you will see where the outlet intersects the base of the bowl.

3. Also scribe the central plane around the outer perimeter block that the holes will need to line up (not the face that you drew the profile on - the top and side)

4. If you have a drill press with a vice excellent - if not you'll just have to be very careful with a hand drill.

5. The outlet passage first: Use a square to set your block with the passage line vertical in the vice - and precheck the depth you will need to intersect the bowl.
I use a 4.9mm drill bit (3/16) for the outlet passage. I drill that down to the intersection depth.
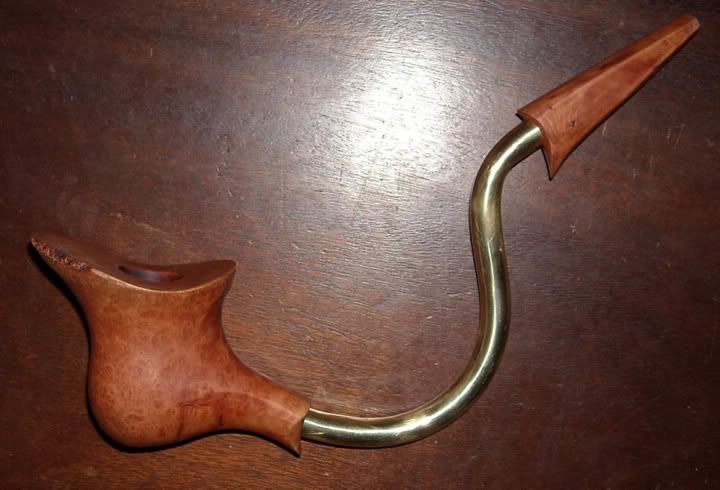
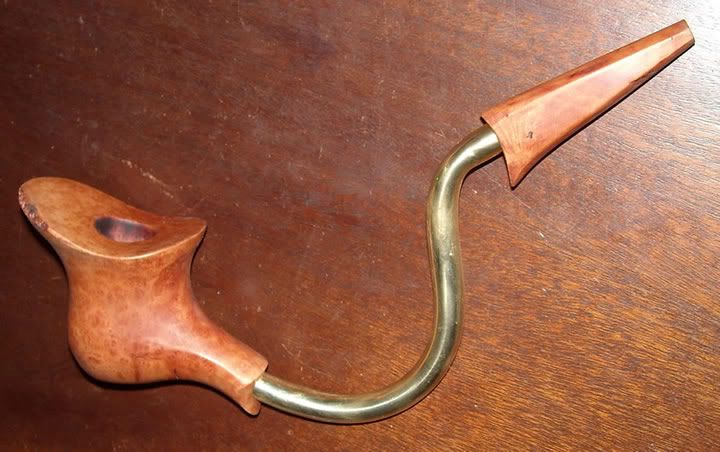
I then grab a 9.1mm bit and drill the hole for the brass pipe. The pipe I have is 9.5mm, so I will be tapering the ends of the pipe on the beltsander.

6. I then drill the bowl hole. I have a 3/4" ball-endmill which is great and gives a nice rounded bottom to the bowl, but a 3/4 drill bit will work fine, and just give you a more angular base - you could use a benchgrinder to round off the tip/flutes of the bit, which will render it useless on any other job but be good for pipe bowls. If you do this you may need to predrill a pilot as the very tip will be blunt.
Once you get your bowl hole close to the depth of the intersection check it regularly to make sure you dont go past your outlet hole. The outlet should be right at the bottom, slightly to the side.

7. Mouthpiece - Can be any wood as it isn't getting hot. As mentioned in the OP I add an extra step in the passage to cater for a filter option.

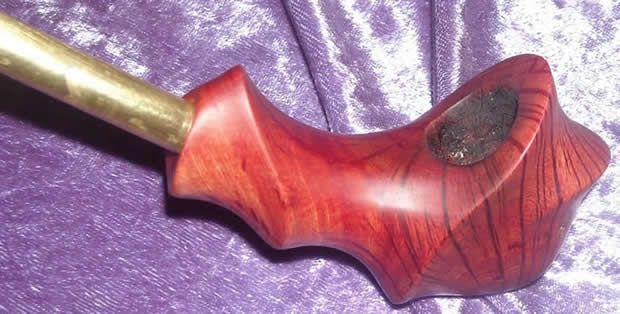
8. Once your holes are drilled you can just go for your life shaping her up with a beltsander. I use a 3" x 21" handheld jobbie which I mount belly up in a vice. Start with a 40 grit belt (wear kevlar gloves, eye protection, and a respirator please), then once you have her 90% to shape work through 120 grit to refine the shape, and 240 grit to smooth of the abrasive marks.
Shape the profile first, as marked on the face of the block, then get to rounding it all up , and thinning it down. You don't want it blocky, try to make it a bit elegant. Try to get the wall thickness around the bowl to 6-9mm (1/4" to 3/8"), with about 1/2" under the bowl. Consider grip and give it some curves to help it snuggle into your hand. I use the wheel far more than the plate.

9. Once she's all shaped up and smoothed off with 240grit belt, then handsand it with 240 grit, 400 > 600 > 800 > and 1200 if you can be bothered. 600 is fine and then cheat and use a calico buffer :). I oil them with "Organoil hard burnishing oil" which is a combination of Tung Nut oil and Citrus Seed oil. It dried a bit harder than Danish oil. DO NOT OIL THE BOWL OR THE PASSAGES - only the outside. Other finishes could be danish oil or Beeswax.

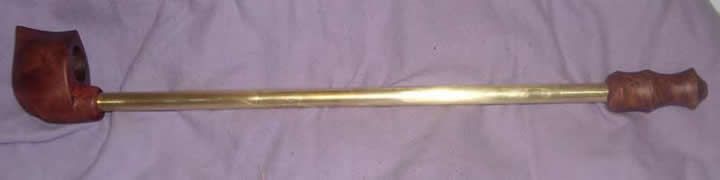
10. Cut your brass or Stainless pipe to length, bend it in a wood jawed vice, using some pipes to round off the curves you bend in to it. Trim it to just the right length. Then use your 240 grit belt (pref. one saved for metals, not your wood one) to bevel the tips down so they slide into your holes but tighten up nicely before they hit the end.

11. Running in:
Basically you need to give it a good layer of carbon before you want to run it at full temp. This will protect the wood from burning. Start with a 1/3 bowl for your first one and dont clean the ash out thoroughly. Then do a 2/3 bowl for your second one, again don't clean it out thoroughly. By then it's picked up the carbon layer you want and you can pack a full bowl and heat up the heart.

Alot of people will smear a virgin bowl with honey and flame it to caramelise it - which makes it taste 'nicer' , protects the wood from burning, and helps pick up carbon from the start. I don't think it's necessarily a good idea, and the Heath doesn't need to mask it's taste. It's very neutral.

Happy crafting folks, send photos :)
User avatar
Mirimaran
Thangailhir
Posts: 2110
Joined: Tue Jul 01, 2008 5:38 pm
Location: North Carolina
Contact:

Re: Heath Briar Tobacco Pipe (Tute Added)

Post by Mirimaran »

Very cool!
"Well, what are you waiting for? I am an old man, and have no time for your falter! Come at me, if you will, for I do not sing songs of dastards!"
User avatar
Peter Remling
Athel Dunedain
Posts: 3735
Joined: Sat Feb 16, 2008 4:20 am

Re: Heath Briar Tobacco Pipe (Tute Added)

Post by Peter Remling »

Interesting, I don't smoke but feel a ranger should at least carry one. They look like fun projects and as soon as I cut down the list of projects I have, I'm going to try one.
Post Reply