Quiver Project


Re: Quiver Project
Please disregard my previous post. I decided I should go for Pete's sandwich idea instead as I was working on my pattern earlier this evening.
And I saw heaven opened, and behold a white horse; and he that sat upon him was called Faithful and True, and in righteousness he doth judge and make war.

Re: Quiver Project
Ah, gotcha. I can't wait to see how yours turns out! I'm currently right in the middle of working on mine. The pieces are all dyed, and some have been glued together. I'm currently working on the sewing portion of it, but it's taking forever, so I'm taking a quick break to check up on things online. Whew. I want to have the thing done for a convention this weekend, so I'm working like a madperson. Hope it gets done in time!
Maerondir Perianseron, also called “Mickel,” Halfling Friend - Ranger of the Misty Mountains
Re: Quiver Project
I'm looking forward to seeing your finished product as well. I cut, shaped, and etched my pattern today and plan to dye it tomorrow and maybe do a bit of stitching.
And I saw heaven opened, and behold a white horse; and he that sat upon him was called Faithful and True, and in righteousness he doth judge and make war.
Re: Quiver Project
Yeesh. Been working on it since about 1:00 PM today, and JUST stopped. It's almost 2:00 AM Colorado time, incidentally. It's not quite finished, but it's really close, and BOY am I excited about the results! I'll post some pics tomorrow hopefully!
Maerondir Perianseron, also called “Mickel,” Halfling Friend - Ranger of the Misty Mountains
Re: Quiver Project
Okay, so I still don't have pics of the quiver, but essentially it's done. I'd estimate it represents upwards of 20 hours of labor for me, but I'm exceedingly proud of the final product. The last thing that needs to be done is to attach the crossing straps that wrap around the main body of the quiver itself, but otherwise it's totally finished. I wore it to a local convention this weekend, but sadly it looks like I didn't get any good pics taken. Hopefully I'll be able to post some in the next couple days.
Maerondir Perianseron, also called “Mickel,” Halfling Friend - Ranger of the Misty Mountains
Re: Quiver Project
Nice. Looking forward to those pics. I'm still working on mine, but I should probably put it away and get to bed soon. 
And I saw heaven opened, and behold a white horse; and he that sat upon him was called Faithful and True, and in righteousness he doth judge and make war.
Re: Quiver Project
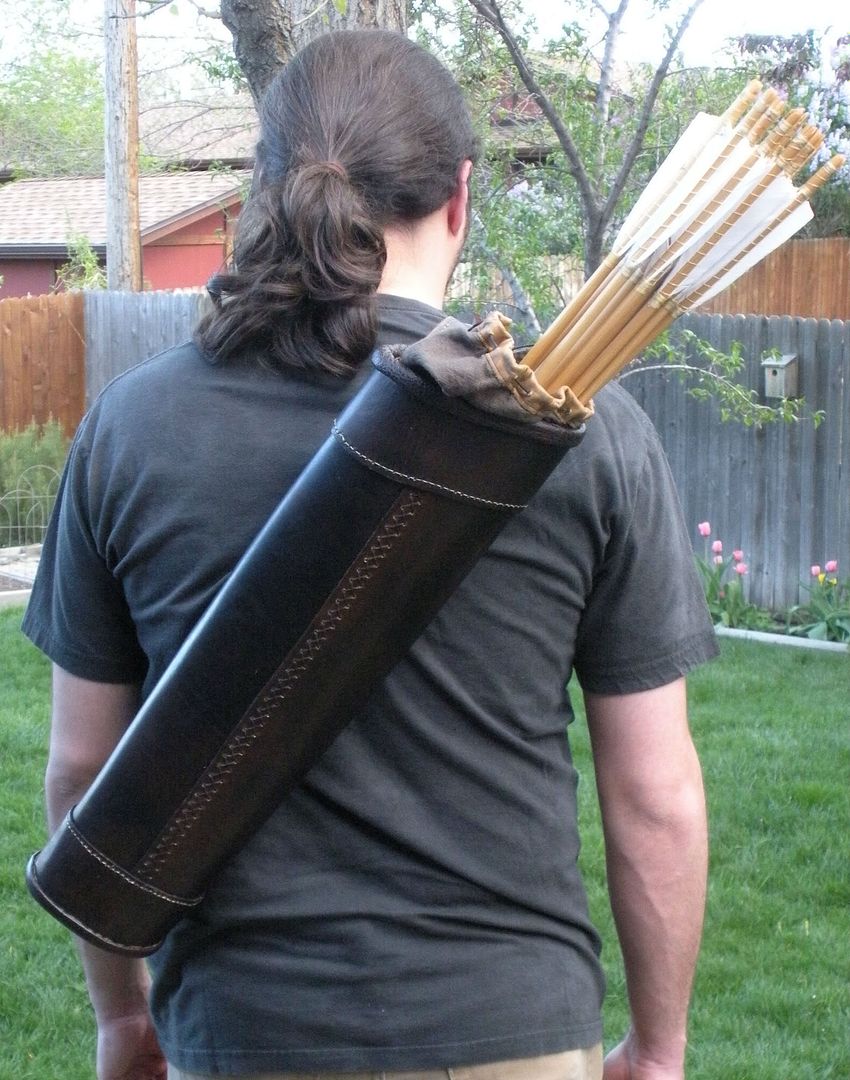
Okay! I just used my quiver at archery practice for the first time, and I LOVE it! Until now I've been using a hip quiver that sat at a very uncomfortable, nearly-horizontal angle, and switching to a back quiver really took some getting used to, but after practicing with it for a couple hours I now feel totally confident. I'm so ridiculously happy with it!
Technically it's still not finished, as I have still not yet added the criss-crossing straps like on Strider's quiver, but I may try to do that tonight. I worry slightly that this might make it less comfortable on my back than it was without them, but I also know they'll make the quiver a ton more versatile. I actually plan to rig the straps so I can do something like this with them: http://mircat-manufacturing.webs.com/bucket1.jpg
Notice how that design allows you to transition between back-quiver and hip-quiver. I think that's pretty brilliant, so I'm going to make sure the straps on mine allow me to unbuckle the shoulder strap and slip it through there, if I ever choose to change things up in that regard.
Anyway, without further ado, I give you pics!
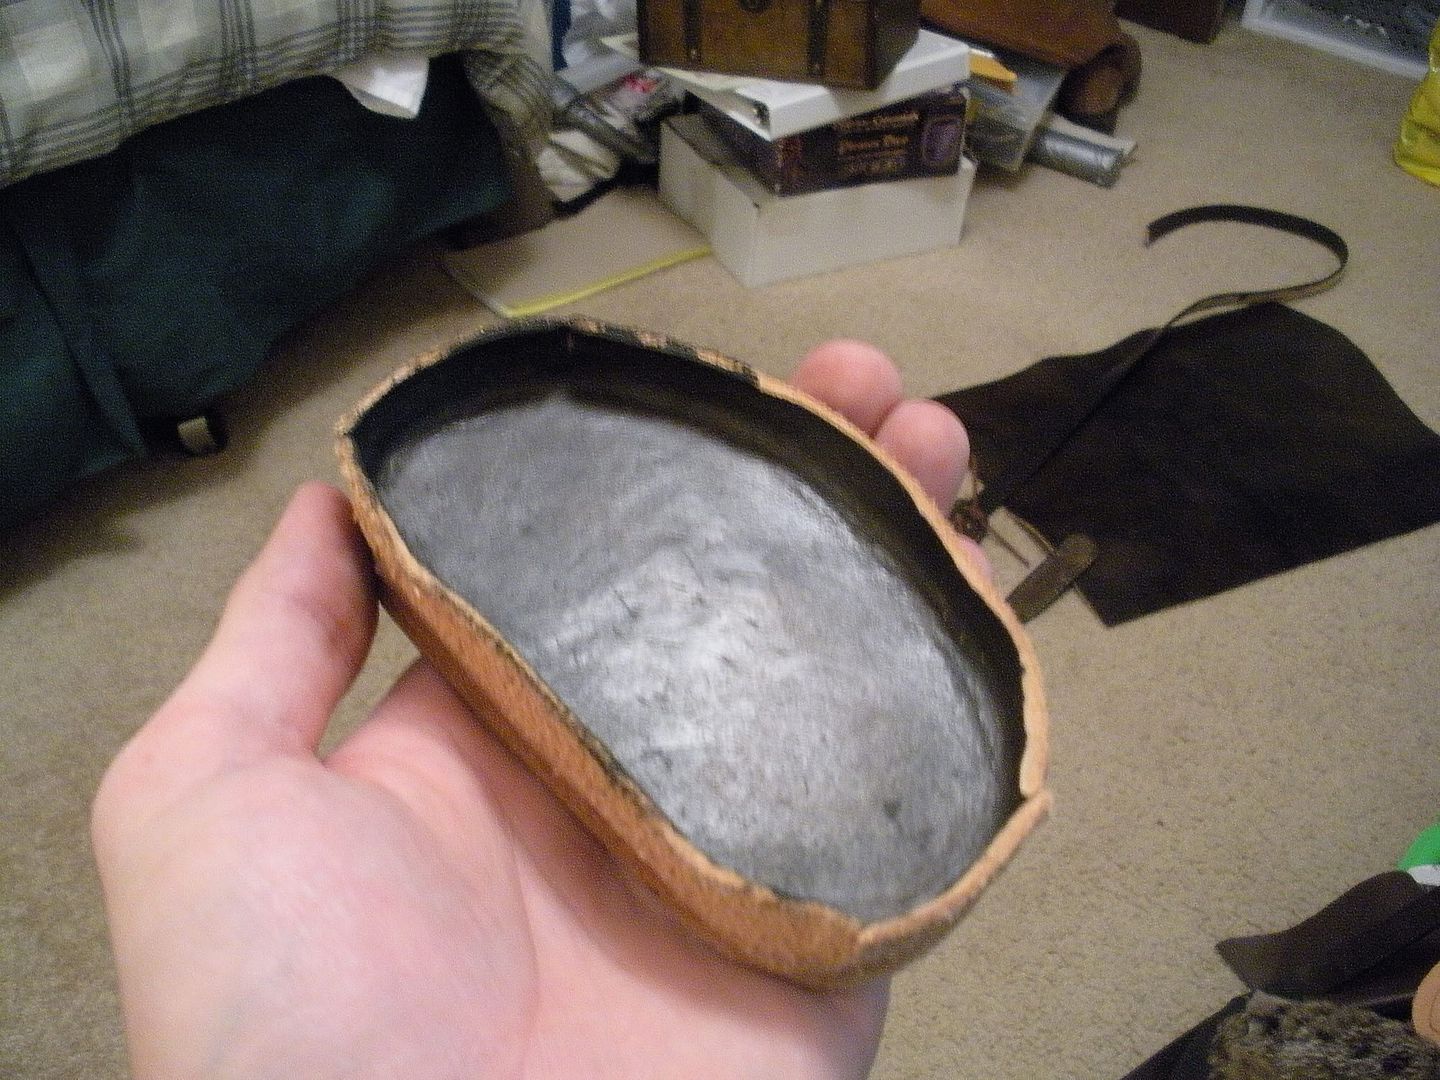
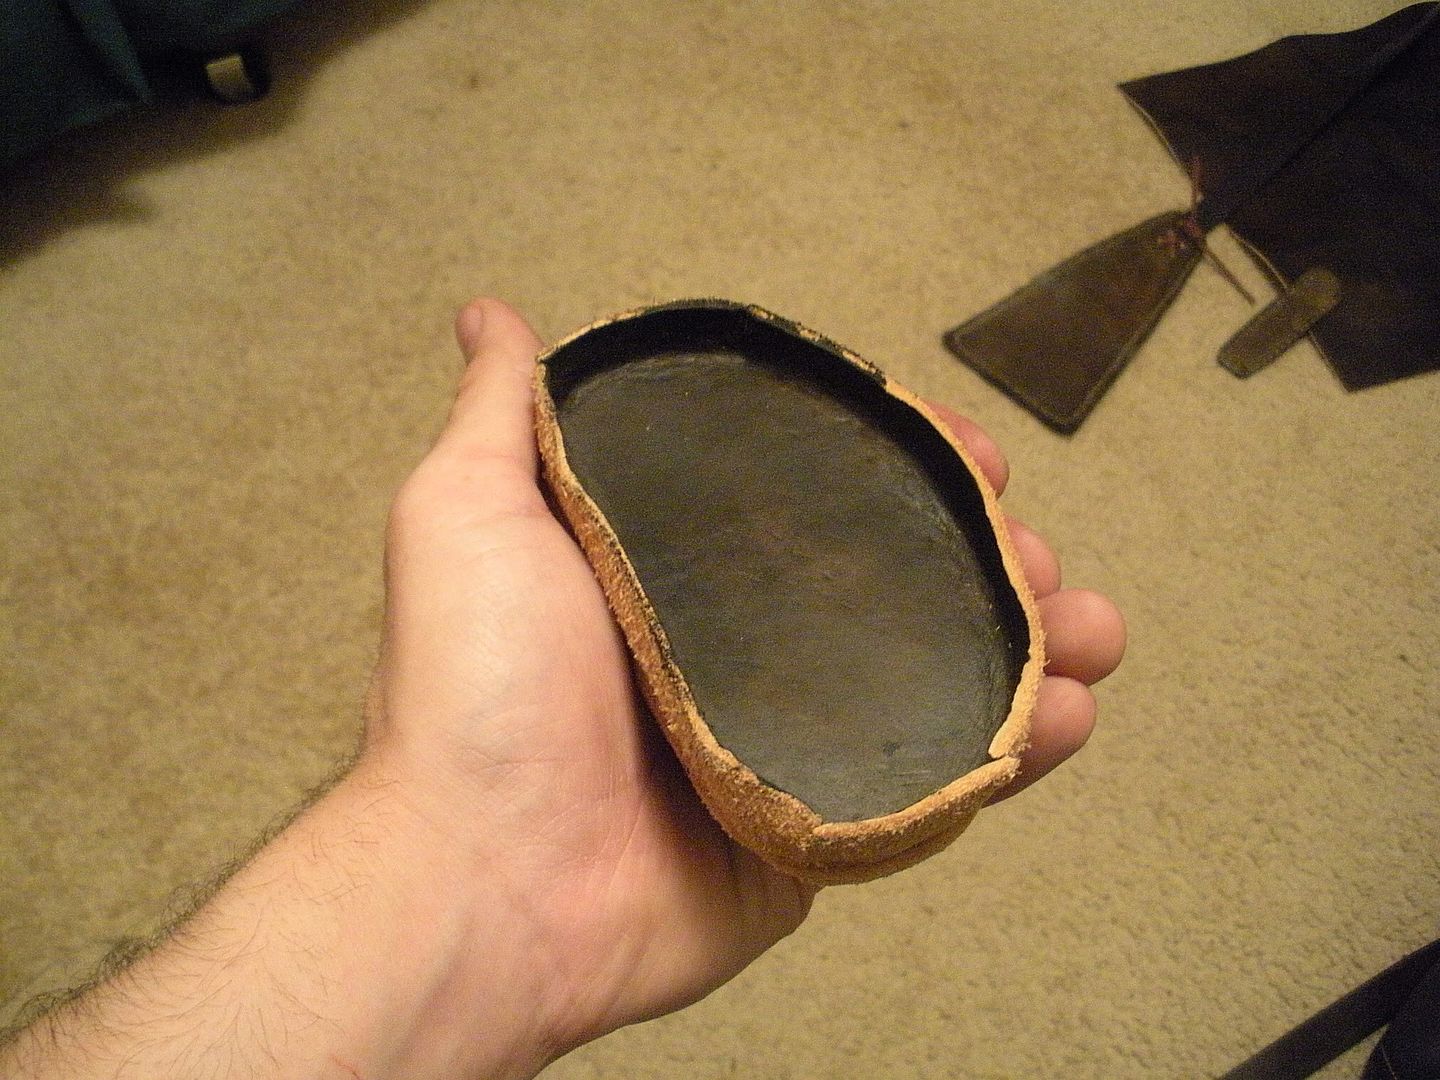
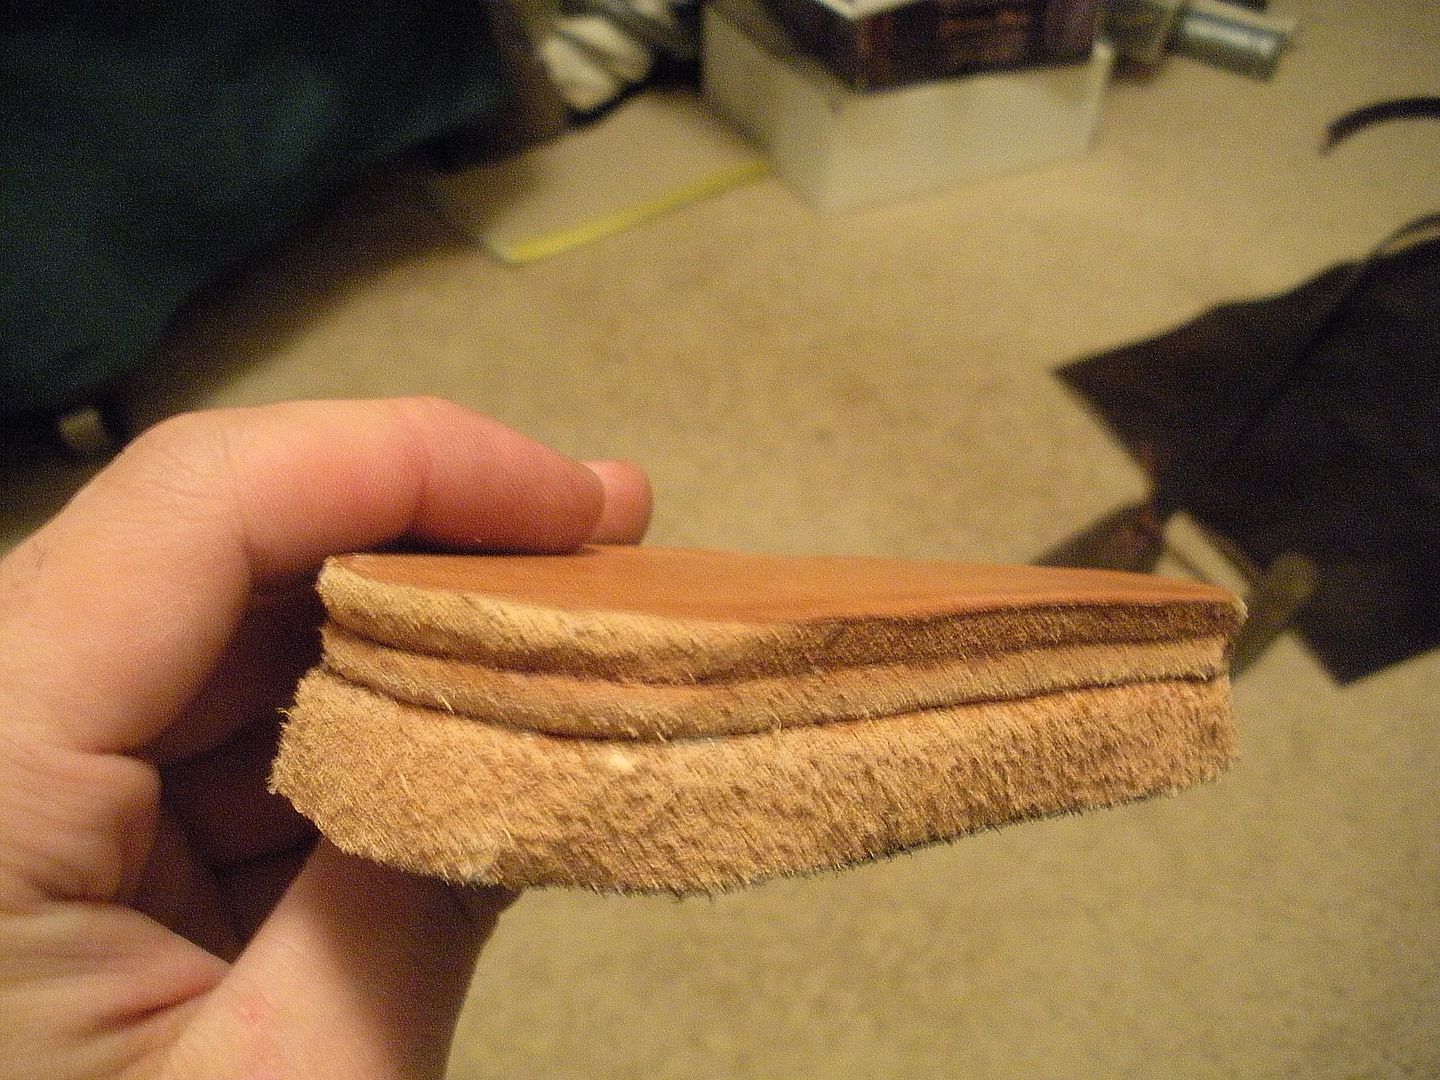
First off, here are a few pics of the quiver in process. These show the plug at the bottom of the quiver, after I re-formed it into an INVERTED cup design, and dyed it. They also show the other two, much heavier layers of leather which I Barge-cemented to the actual bottom piece:
http://i39.photobucket.com/albums/e173/ ... CN2302.jpg
http://i39.photobucket.com/albums/e173/ ... CN2306.jpg
http://i39.photobucket.com/albums/e173/ ... CN2308.jpg
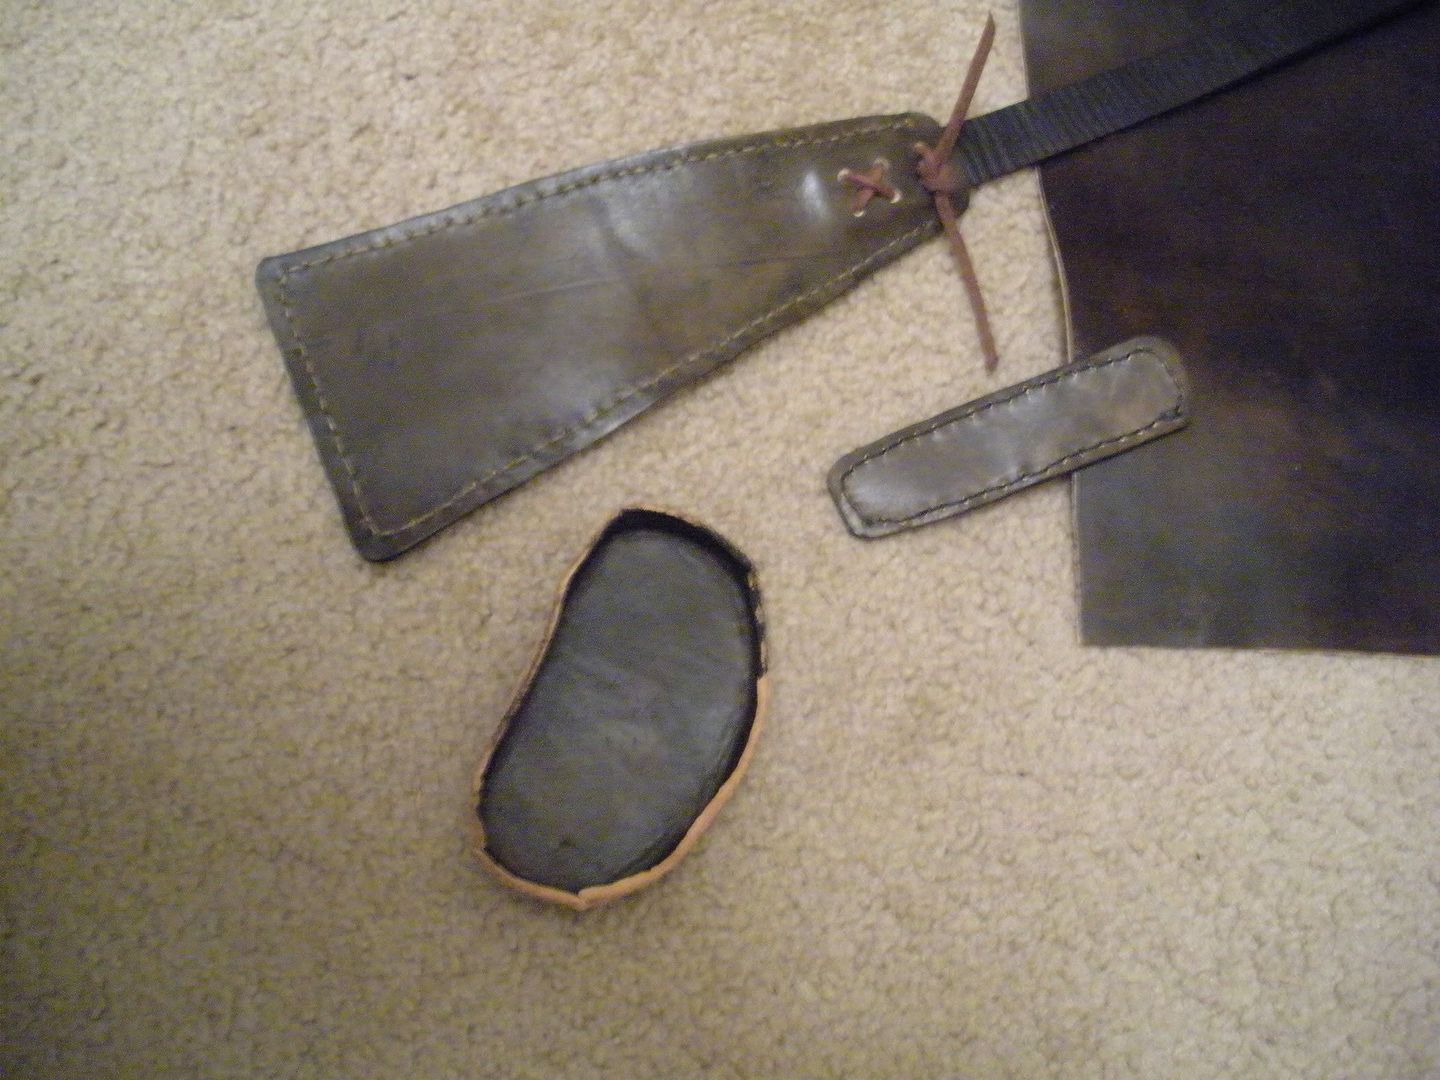
The next one shows the same, but also includes a decent shot of the top and bottom of the shoulder strap setup before I attached them to the quiver itself, as well as the corner of the quiver body before it was sewn up:
http://i39.photobucket.com/albums/e173/ ... CN2301.jpg
Here's a picture of it almost finished. The body is sewn up, but the ends aren't finished, and the straps aren't attached. The bottom end-cap is only glued on with Barge cement at this point, but the top has been sewn on:
http://i39.photobucket.com/albums/e173/ ... CN2318.jpg
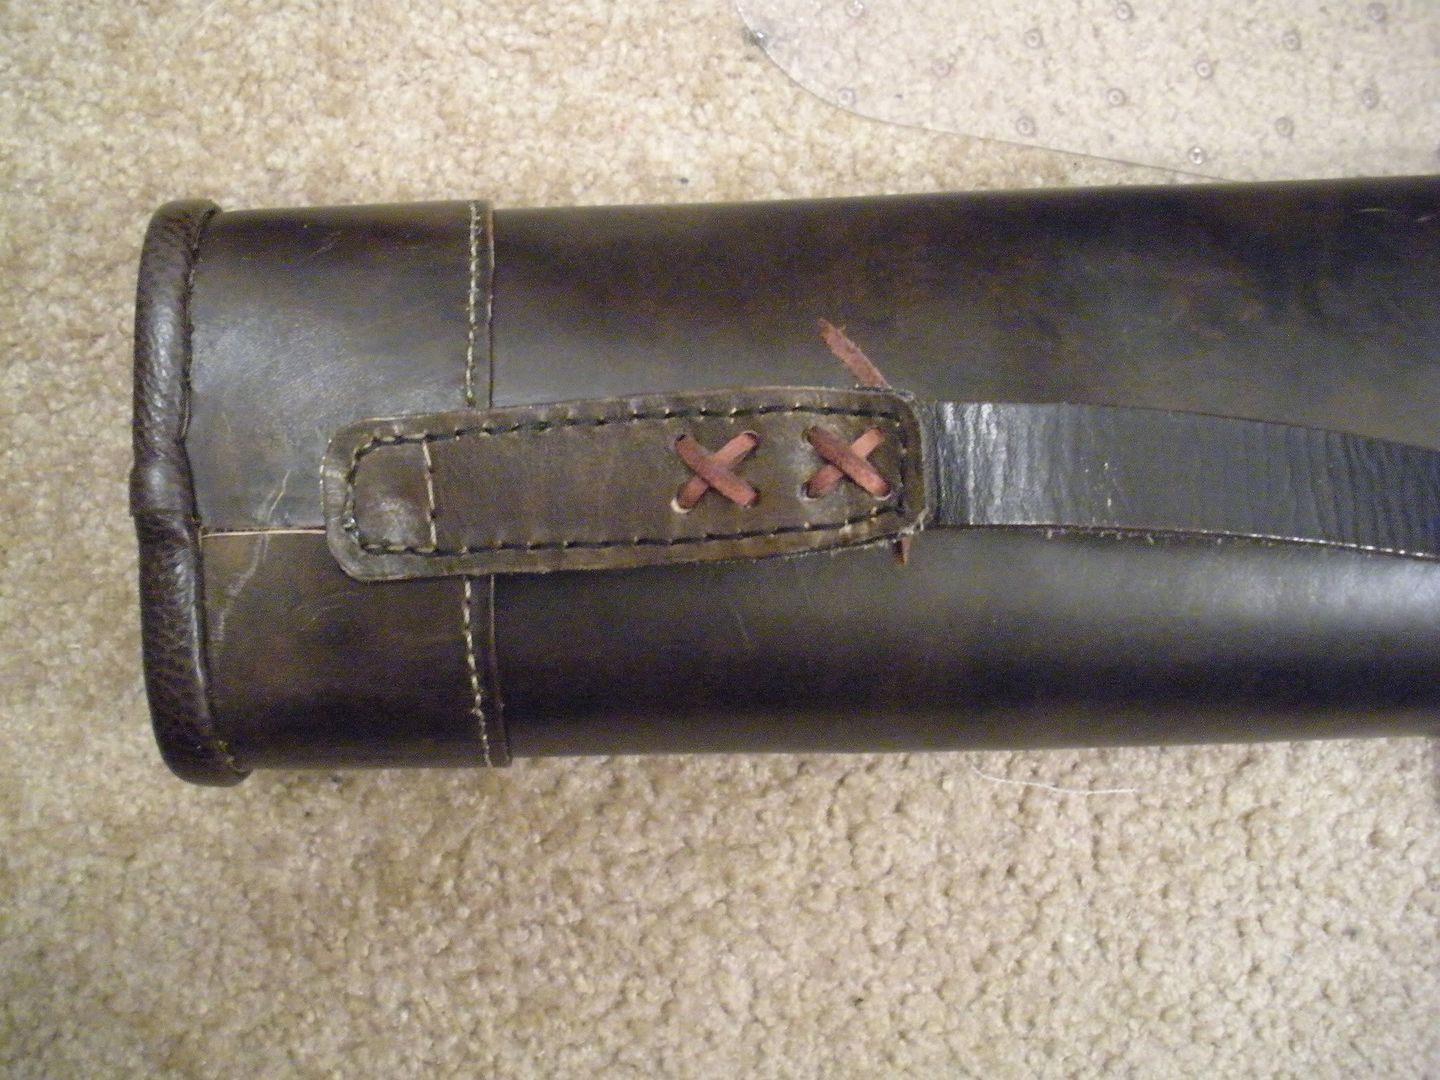
And now, some pictures of the "finished" quiver (or at lest as far as it is now)! The first two show detail on the top and bottom attachments of the shoulder strap:
http://i39.photobucket.com/albums/e173/ ... CN2325.jpg
http://i39.photobucket.com/albums/e173/ ... CN2326.jpg
It's difficult to tell, but I designed it so that the top of the shoulder strap actually fits between the two sewn layers of leather that form the upper part of the carriage, and then laces in. I thought this would make it more comfortable, and I'm really glad I did it. The bottom I forgot to actually sew onto the quiver until AFTER I attached the bottom plug, so stitching it on was something of a nightmare.
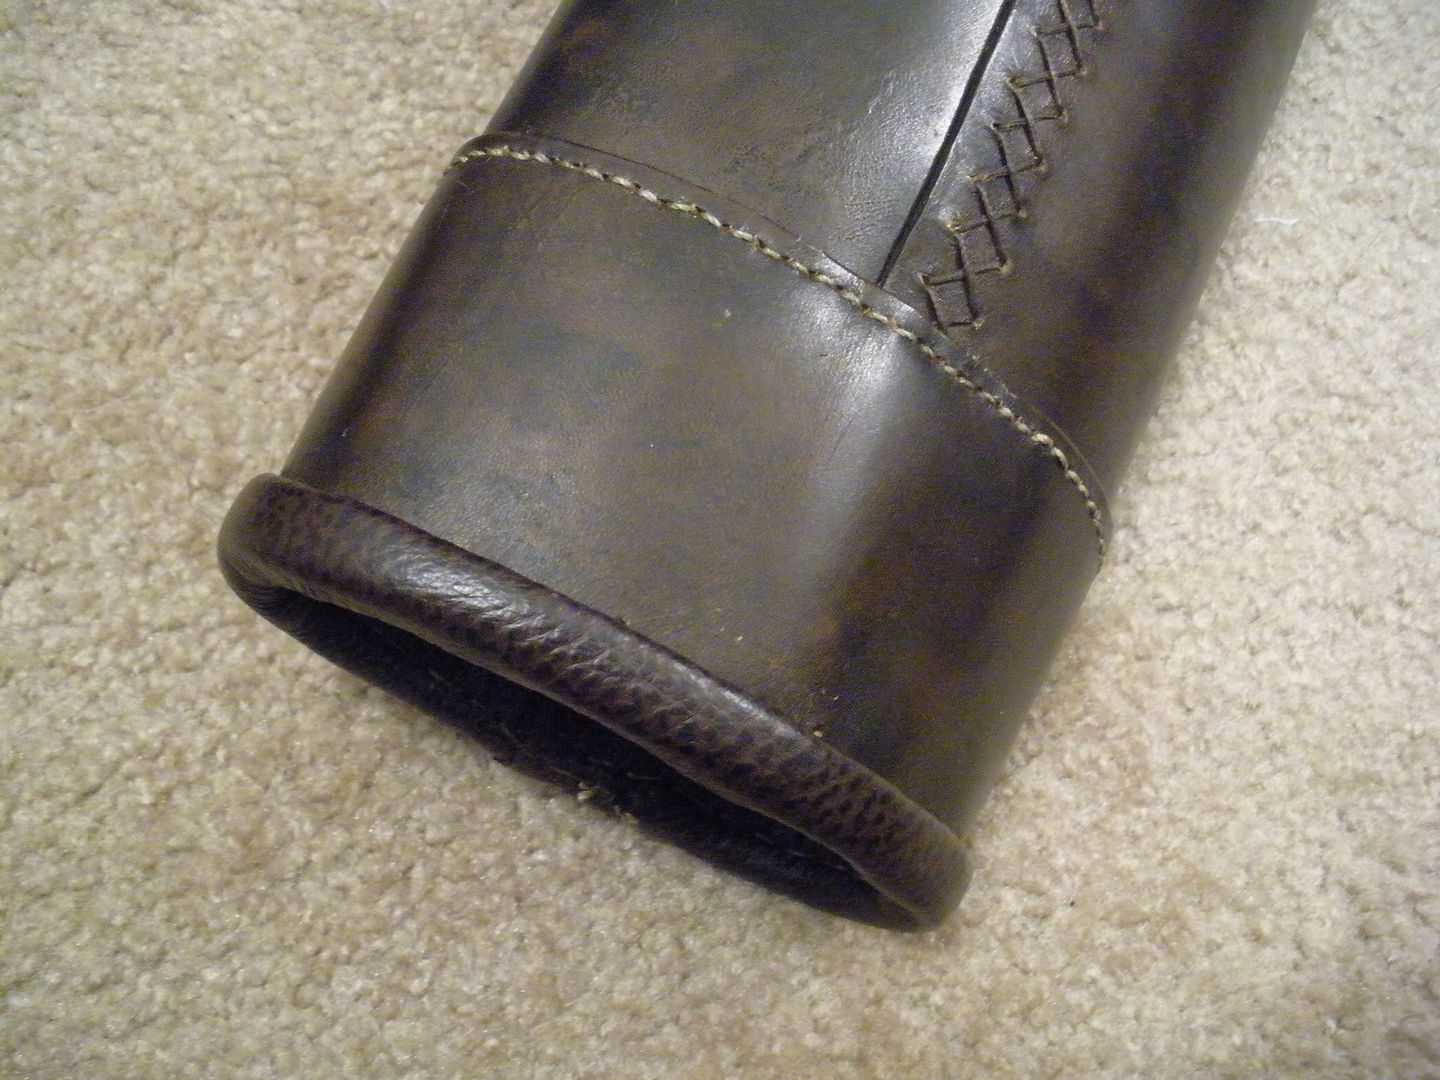
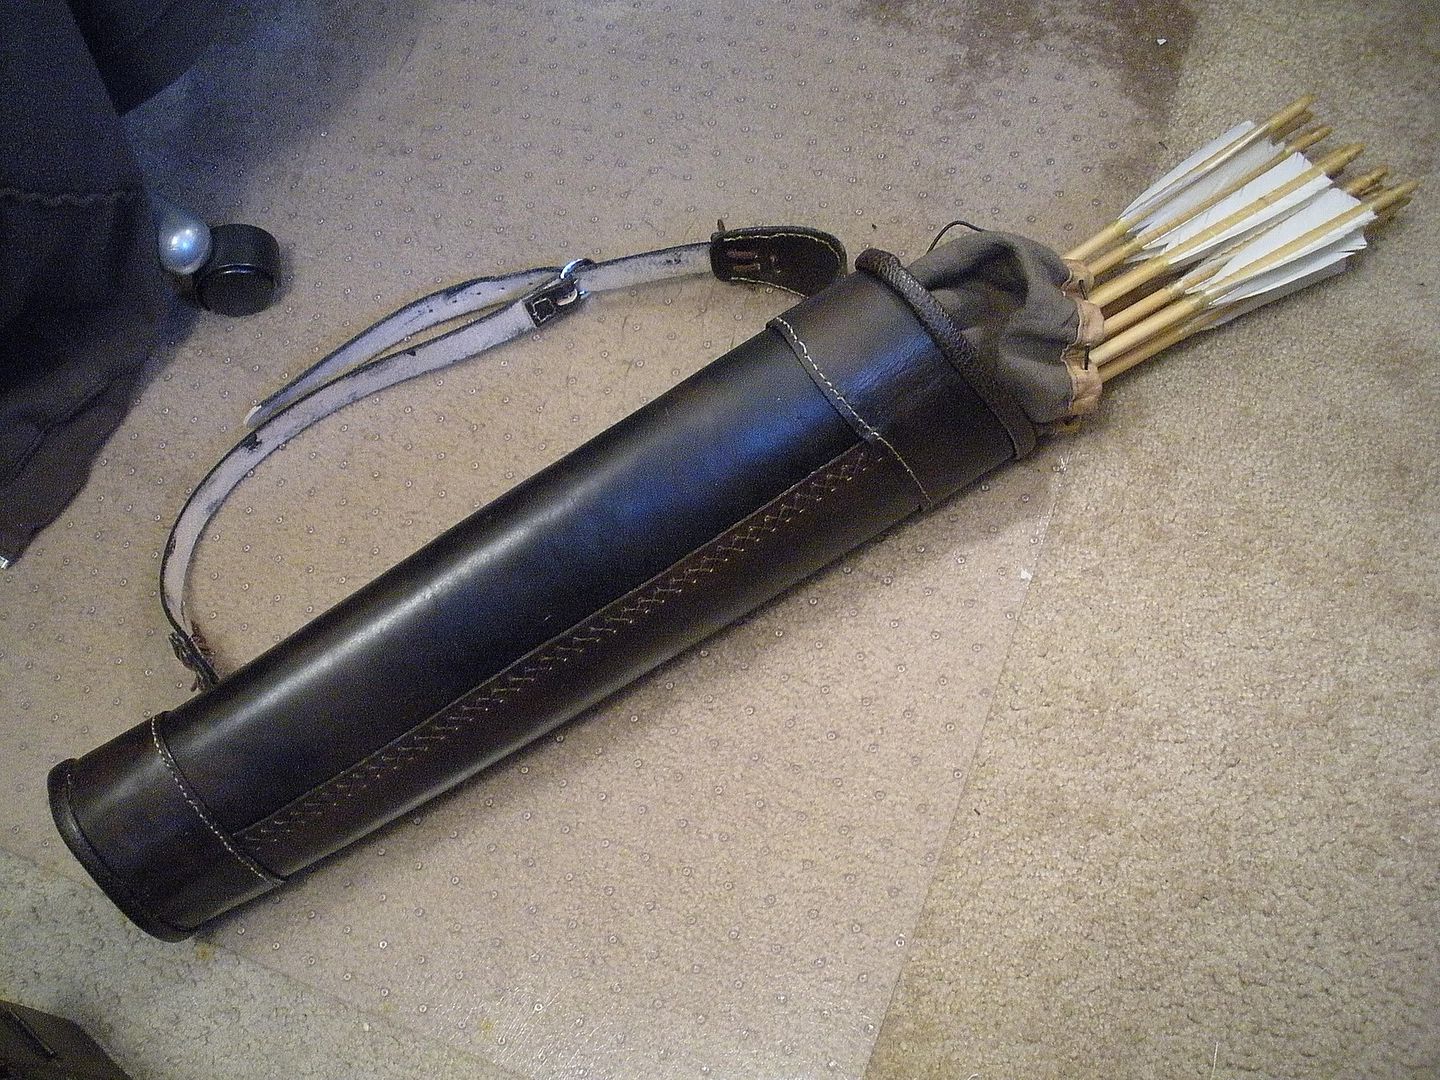
Anyway, moving on, here are a couple shots of the finished top and bottom edges. I used a method that I believe is called "French edging" on them (my first attempt), and I think it turned out pretty well. Still, if you look too closely at the stitching you can see I got a little sloppy. Oh well. I'm still pretty happy with it, and I think it gives the whole thing a nice, finished look:
http://i39.photobucket.com/albums/e173/ ... CN2328.jpg
http://i39.photobucket.com/albums/e173/ ... CN2329.jpg
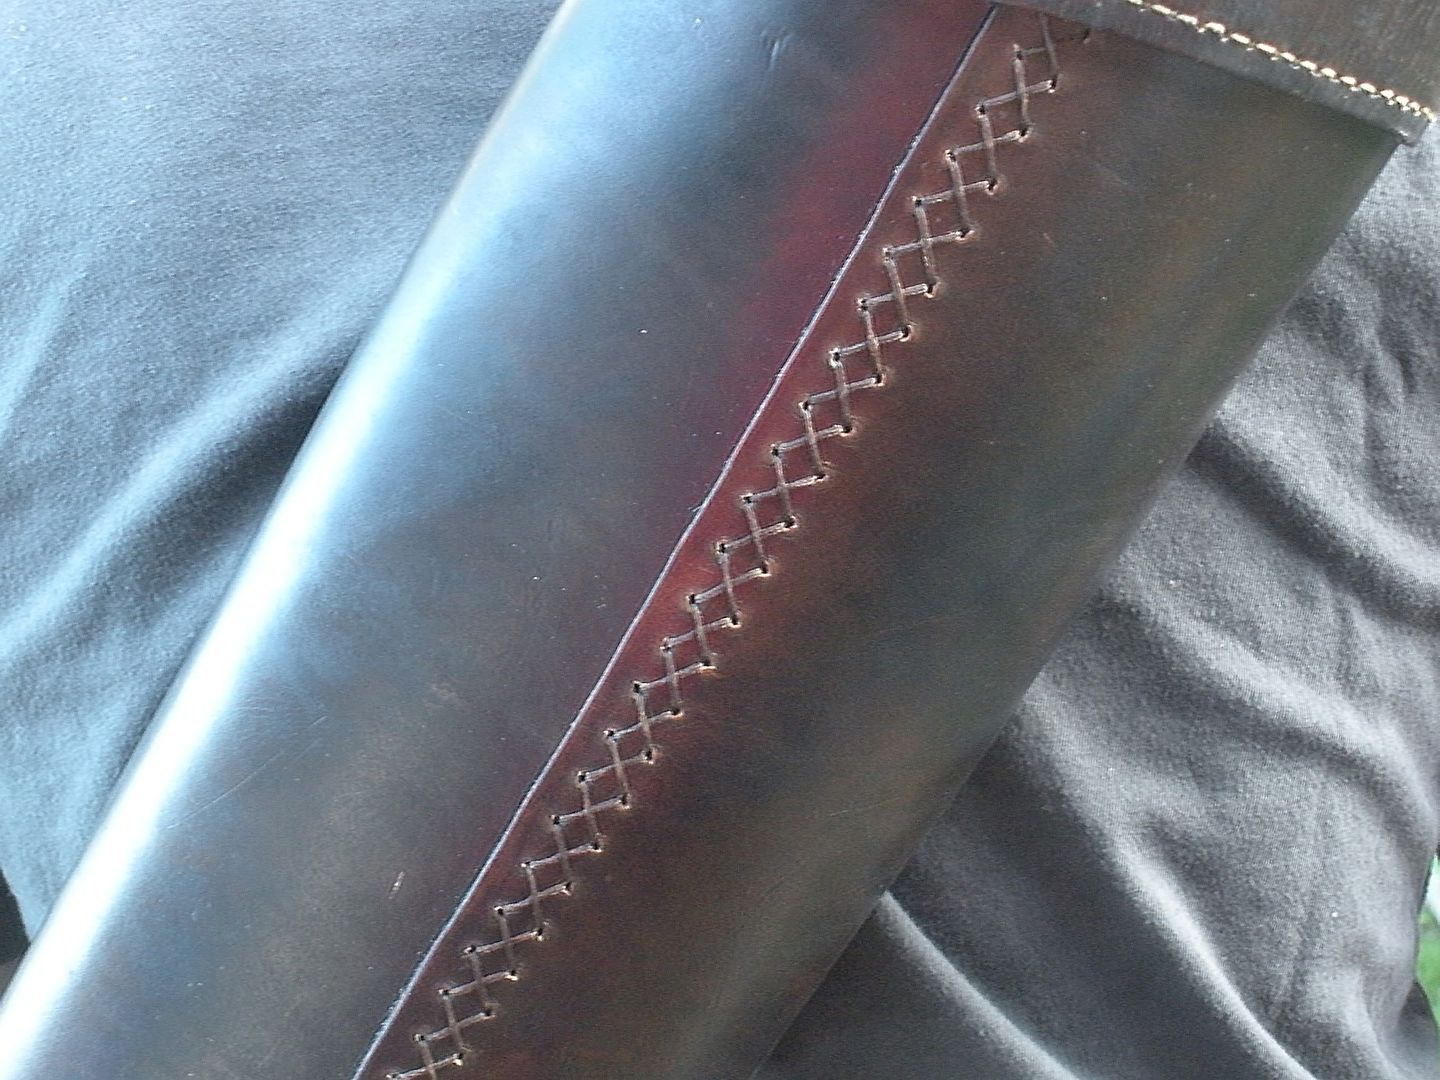
And here's some detail on the stitching I did down the center back. This took me bloody FOREVER:
http://i39.photobucket.com/albums/e173/ ... CN2332.jpg
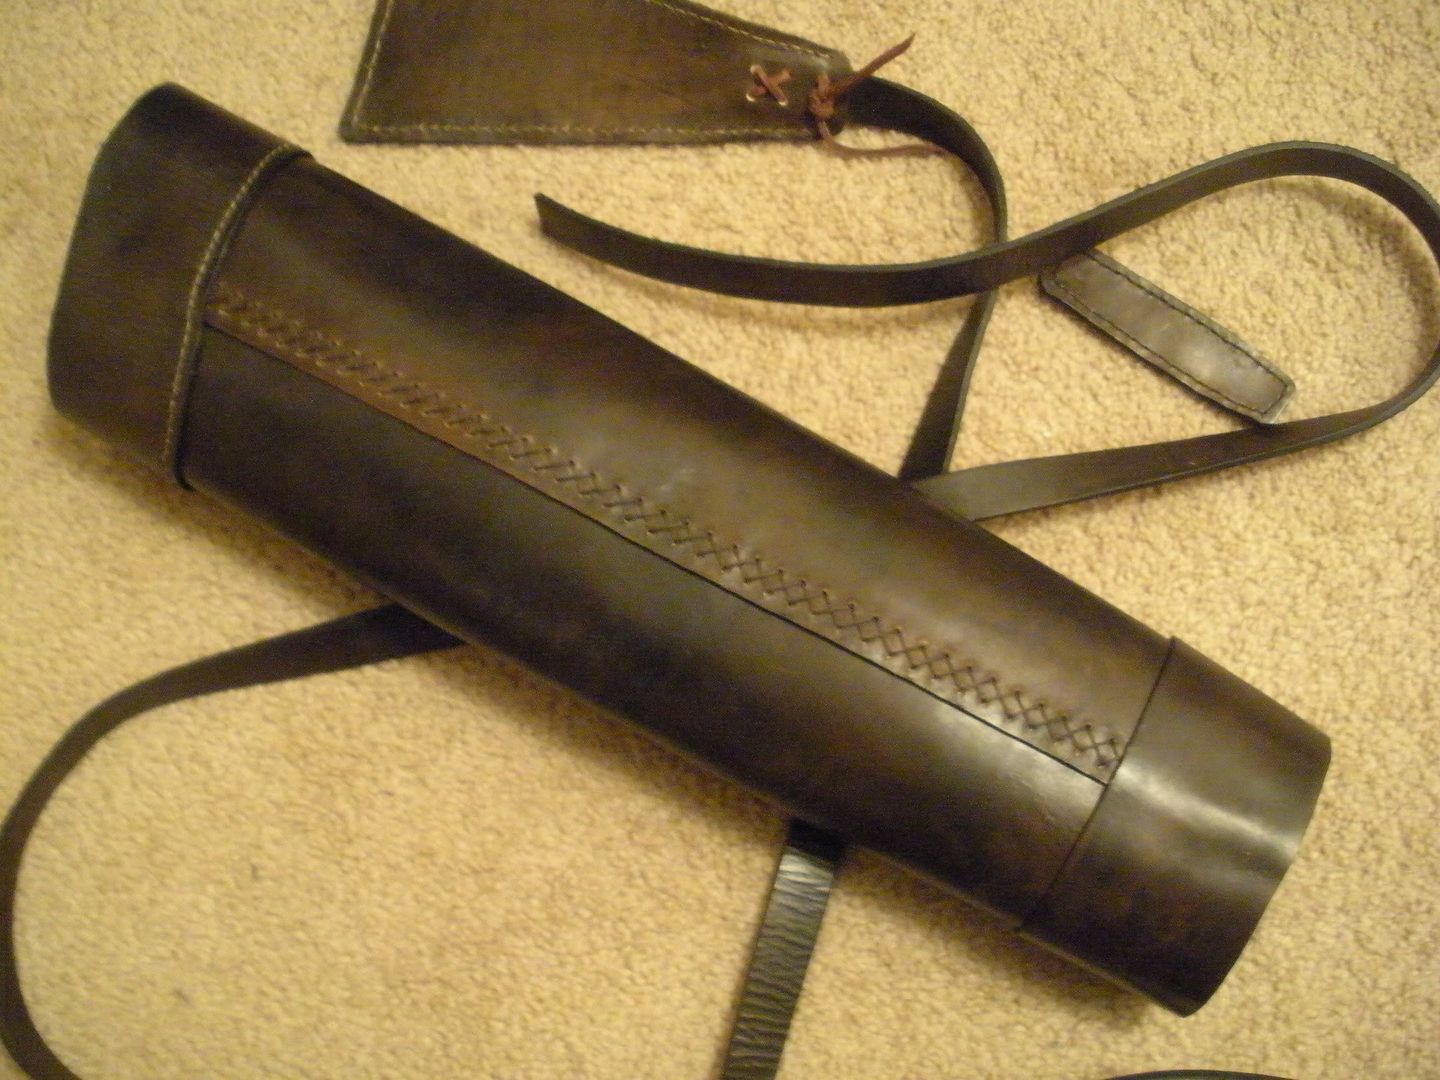
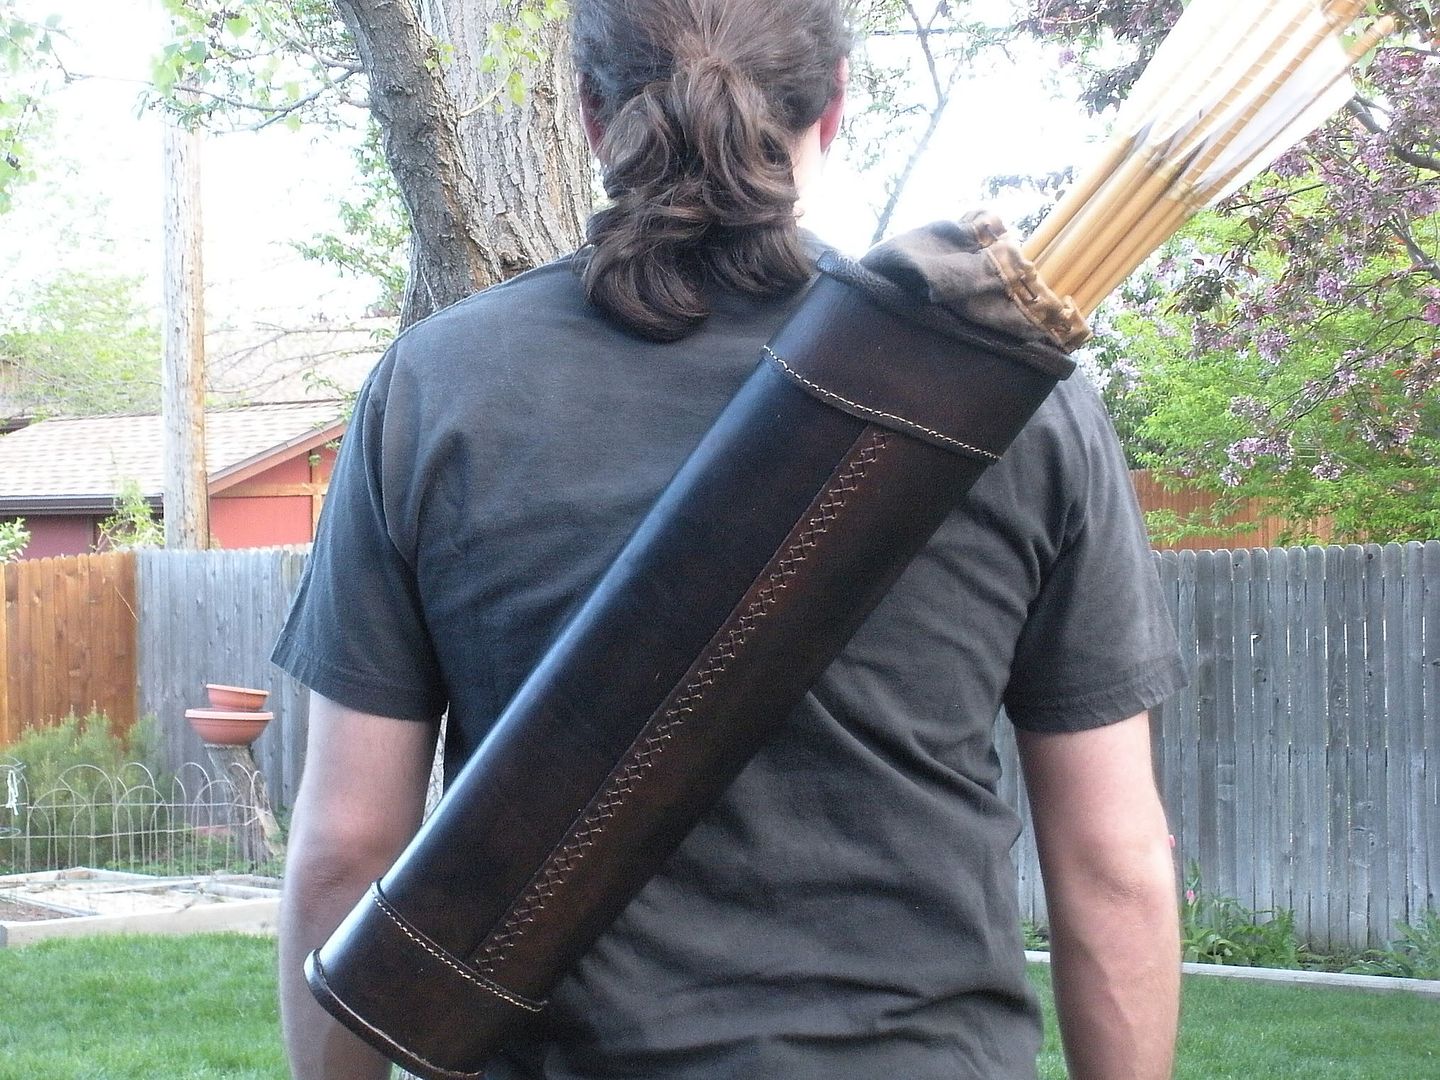
And finally, some pics of the whole thing, including a couple of me actually wearing it:
http://i39.photobucket.com/albums/e173/ ... CN2324.jpg
http://i39.photobucket.com/albums/e173/ ... CN2335.jpg
http://i39.photobucket.com/albums/e173/ ... 1335244466
So there you go! As for general info, I used Eco-Flo antique gel in an "antique black" for the color. The antique black is really just a very, very dark brown, and I was extremely pleased with the finish. I still need to seal it and waterproof it though. I used three colors of thread, as you may notice, because I actually ran out of two different spools during the process, so I kind of had to improvise. Still, I think it all turned out really well, and has a good overall look. The straight stitches are all lock stitches done with a sewing awl, and the "x" stitches were punched with an awl and then hand laced.
I can't wait to share more pics when the straps are attached and it's finally REALLY complete!
Technically it's still not finished, as I have still not yet added the criss-crossing straps like on Strider's quiver, but I may try to do that tonight. I worry slightly that this might make it less comfortable on my back than it was without them, but I also know they'll make the quiver a ton more versatile. I actually plan to rig the straps so I can do something like this with them: http://mircat-manufacturing.webs.com/bucket1.jpg
Notice how that design allows you to transition between back-quiver and hip-quiver. I think that's pretty brilliant, so I'm going to make sure the straps on mine allow me to unbuckle the shoulder strap and slip it through there, if I ever choose to change things up in that regard.
Anyway, without further ado, I give you pics!
First off, here are a few pics of the quiver in process. These show the plug at the bottom of the quiver, after I re-formed it into an INVERTED cup design, and dyed it. They also show the other two, much heavier layers of leather which I Barge-cemented to the actual bottom piece:
http://i39.photobucket.com/albums/e173/ ... CN2302.jpg
http://i39.photobucket.com/albums/e173/ ... CN2306.jpg
http://i39.photobucket.com/albums/e173/ ... CN2308.jpg
The next one shows the same, but also includes a decent shot of the top and bottom of the shoulder strap setup before I attached them to the quiver itself, as well as the corner of the quiver body before it was sewn up:
http://i39.photobucket.com/albums/e173/ ... CN2301.jpg
Here's a picture of it almost finished. The body is sewn up, but the ends aren't finished, and the straps aren't attached. The bottom end-cap is only glued on with Barge cement at this point, but the top has been sewn on:
http://i39.photobucket.com/albums/e173/ ... CN2318.jpg
And now, some pictures of the "finished" quiver (or at lest as far as it is now)! The first two show detail on the top and bottom attachments of the shoulder strap:
http://i39.photobucket.com/albums/e173/ ... CN2325.jpg
http://i39.photobucket.com/albums/e173/ ... CN2326.jpg
It's difficult to tell, but I designed it so that the top of the shoulder strap actually fits between the two sewn layers of leather that form the upper part of the carriage, and then laces in. I thought this would make it more comfortable, and I'm really glad I did it. The bottom I forgot to actually sew onto the quiver until AFTER I attached the bottom plug, so stitching it on was something of a nightmare.
Anyway, moving on, here are a couple shots of the finished top and bottom edges. I used a method that I believe is called "French edging" on them (my first attempt), and I think it turned out pretty well. Still, if you look too closely at the stitching you can see I got a little sloppy. Oh well. I'm still pretty happy with it, and I think it gives the whole thing a nice, finished look:
http://i39.photobucket.com/albums/e173/ ... CN2328.jpg
http://i39.photobucket.com/albums/e173/ ... CN2329.jpg
And here's some detail on the stitching I did down the center back. This took me bloody FOREVER:
http://i39.photobucket.com/albums/e173/ ... CN2332.jpg
And finally, some pics of the whole thing, including a couple of me actually wearing it:
http://i39.photobucket.com/albums/e173/ ... CN2324.jpg
http://i39.photobucket.com/albums/e173/ ... CN2335.jpg
http://i39.photobucket.com/albums/e173/ ... 1335244466
So there you go! As for general info, I used Eco-Flo antique gel in an "antique black" for the color. The antique black is really just a very, very dark brown, and I was extremely pleased with the finish. I still need to seal it and waterproof it though. I used three colors of thread, as you may notice, because I actually ran out of two different spools during the process, so I kind of had to improvise. Still, I think it all turned out really well, and has a good overall look. The straight stitches are all lock stitches done with a sewing awl, and the "x" stitches were punched with an awl and then hand laced.
I can't wait to share more pics when the straps are attached and it's finally REALLY complete!
Maerondir Perianseron, also called “Mickel,” Halfling Friend - Ranger of the Misty Mountains
-
Peter Remling

- Athel Dunedain
- Posts: 3735
- Joined: Sat Feb 16, 2008 4:20 am
Re: Quiver Project
Very nice job, looks professionally done !
-
Mirimaran

- Thangailhir
- Posts: 2110
- Joined: Tue Jul 01, 2008 5:38 pm
- Location: North Carolina
- Contact:
Re: Quiver Project
Outstanding job! I'd pay money for that, and that's a compliment! Love the rolled top, it looks like you got that angle just right! How does it feel to you wearing it?
Ken
Ken
"Well, what are you waiting for? I am an old man, and have no time for your falter! Come at me, if you will, for I do not sing songs of dastards!"
-
kaelln
Re: Quiver Project
Very nicely done!

Re: Quiver Project
Wow, it turned out very neat and professionally done. Impressed with the edging and everything. Thank you for sharing the pictures of your progress. Did you use a pattern or just make it up yourself? Well done, Ranger!
"The women of this country learned long ago, those without swords can still die upon them. I fear neither death nor pain. "
Re: Quiver Project
Thanks a bunch guys! This has definitely been a challenging project for me. It's way beyond anything I've done with leather before. I'm exceedingly pleased with how it has turned out.
As for the angle of how it sits, that's one thing I'm not 100% sure about just yet. It's pretty good, all things considered - I used it last night to shoot, and I was extremely pleased - but I feel like it might lay better, and more flat against my back, if I had sewn the top part of the shoulder strap setup closer to the actual top of the quiver (perhaps onto the upper cuff), and also if I had sewn the bottom strap attachment off to one side instead of in the dead center of the quiver back.
Still, it's a learning experience, and I'm absolutely happy enough with it to let this very minor nitpick go. When shooting last night I got a great rhythm down with this new setup, and I feel I can loose my arrows considerably faster this way than with the hip quiver I was using before. At first it was awkward, and it even really screwed with my accuracy while I wasn't used to it, but now I think it's going to do my shooting a world of good.
I'll get you guys some more pics and info when I get the straps attached!
Maerondir Perianseron, also called “Mickel,” Halfling Friend - Ranger of the Misty Mountains
-
deadextra

- Silent Watcher over the Peaceful Lands
- Posts: 116
- Joined: Wed Dec 21, 2011 7:48 am
- Location: Columbus, Indiana
Re: Quiver Project
That looks excellent, well done. Any plans on getting a bronze buckle for it?

Re: Quiver Project
Wow beautifully done my Friend!
It looks professionally made in every sense of the word.
The stitching so meticulously accurrate and very neet.
nice choice of leather and finishing!
Well done!

It looks professionally made in every sense of the word.
The stitching so meticulously accurrate and very neet.
nice choice of leather and finishing!
Well done!
I am Ringulf the Dwarven Woodsman, I craft leather, wood, metal, and clay,
I throw axes, seaxes, and pointy sticks, And I fire my bow through the day.
Come be my ally, lift up your mead! We'll search out our foes and the Eagles we'll feed!
I throw axes, seaxes, and pointy sticks, And I fire my bow through the day.
Come be my ally, lift up your mead! We'll search out our foes and the Eagles we'll feed!