New Big Clothing Project!
-
mcapanelli

- Haeropada
- Posts: 757
- Joined: Sat Feb 16, 2008 1:48 pm
- Location: New York, New York
- Contact:
Re: New Big Clothing Project!
I don't know, I think the jackets rather posh. You could go for a 60's Austin Powers inspired ranger ensemble, or maybe I shouldn't post comments before I've had morning coffee. I can't really figure out witch one right now.
Winter is coming
-
Mirimaran

- Thangailhir
- Posts: 2110
- Joined: Tue Jul 01, 2008 5:38 pm
- Location: North Carolina
- Contact:
Re: New Big Clothing Project!
You are right about the pockets, Greg. I did tear a hole in mine removing pockets, so what I did was get a square of leather from Michaels and then then glued it over the hole, and then using some of the scrap leather from the coat stitched pockets back on. It works!
"Well, what are you waiting for? I am an old man, and have no time for your falter! Come at me, if you will, for I do not sing songs of dastards!"
-
Peter Remling

- Athel Dunedain
- Posts: 3738
- Joined: Sat Feb 16, 2008 4:20 am
Re: New Big Clothing Project!
You'll probably only tear a hole if you're not careful with the razor or the garment as rivets. Regardless of how careful you are rivets will leave holes. Some of the military packs I've converted had rivets so reinforced leather straps, buckles or decorative conchos/belt mounts etc. will leave a fresh personlized look without costing an arm and a leg.
If you do make a hole/mistake, you can also cover it with a leather leaf or symbol from another contrasting color. After you cover the hole you can place several others on the garment and it will look like you planned it that way.
Leaves, birds, small animals, feathers or trees are just some examples.
-
Greg

- Urush bithî 'nKi ya-nam bawâb
- Posts: 4498
- Joined: Tue Dec 02, 2008 8:50 pm
- Location: Eriador; Central Indiana
Re: New Big Clothing Project!
Alright, no pictures until I'm back from the lake on Wednesday evening, but here's what I'm doing:
I'm ripping out the lining, cutting off the sleeves, drawing out where my new seams will be, and inserting eyelets, hopefully.
I'm ripping out the lining, cutting off the sleeves, drawing out where my new seams will be, and inserting eyelets, hopefully.
Now the sword shall come from under the cloak.
-
Sam

- Silent Watcher over the Peaceful Lands
- Posts: 106
- Joined: Mon Jan 19, 2009 11:00 pm
- Location: Australia
Re: New Big Clothing Project!
Wow, this is exactly what I was thinking of doing. Great rangers think alike and all that.
Just need to find a reasonable jacket...
Would you believe that there are no leather stores within a few hundred kilometres of my place?
At any rate, I'm extremely interested in how you go with this. Budget rangers unite
Just need to find a reasonable jacket...
Would you believe that there are no leather stores within a few hundred kilometres of my place?
At any rate, I'm extremely interested in how you go with this. Budget rangers unite
-
Greg
- Urush bithî 'nKi ya-nam bawâb
- Posts: 4498
- Joined: Tue Dec 02, 2008 8:50 pm
- Location: Eriador; Central Indiana
Re: New Big Clothing Project!
Alrighty, update time. It's high time we got back to business on this, eh?
Here's my jacket sans everything I didn't want. The lining is gone, the collar is gone, the sleeves are gone, and the front pockets are gone. In the first photo, about 2/3 of the way down the jacket, you can see some faint squares marking where the pockets used to be. There are stitching holes all the way around where the pockets were, but that won't be a big problem. If I find moisture seeping through those holes someday while I'm out in the rain, I'll run waxed thread through them to plug them up.


Next thing to do is stitch up around the edges. A lot of the seams got opened up or loosened when ripping out the lining, so we're gonna have to stitch those back up. After that, it's dyeing time.
If you're doing this too, feel free to post pics of your progress along with me!
Here's my jacket sans everything I didn't want. The lining is gone, the collar is gone, the sleeves are gone, and the front pockets are gone. In the first photo, about 2/3 of the way down the jacket, you can see some faint squares marking where the pockets used to be. There are stitching holes all the way around where the pockets were, but that won't be a big problem. If I find moisture seeping through those holes someday while I'm out in the rain, I'll run waxed thread through them to plug them up.
Next thing to do is stitch up around the edges. A lot of the seams got opened up or loosened when ripping out the lining, so we're gonna have to stitch those back up. After that, it's dyeing time.
If you're doing this too, feel free to post pics of your progress along with me!
Now the sword shall come from under the cloak.
-
Peter Remling
- Athel Dunedain
- Posts: 3738
- Joined: Sat Feb 16, 2008 4:20 am
Re: New Big Clothing Project!
As it stands now it looks very much like the WWII Engineer;s leather jerkins:
- Attachments
-
- WWII Jerkin.jpg (16.97 KiB) Viewed 12238 times

Re: New Big Clothing Project!
to be honest the color in those pics didn't look that bad, I would say alittle darker to brown but I'm sure its different in person. Looking good at any rate.
"Knowledge is a weapon. I intend to be formidably armed." Richard, the Seeker (Sword of Truth)"
-
Greg
- Urush bithî 'nKi ya-nam bawâb
- Posts: 4498
- Joined: Tue Dec 02, 2008 8:50 pm
- Location: Eriador; Central Indiana
Re: New Big Clothing Project!
I'd agree, but take a look at the photos of the area I'm in, and then look at the jacket again. Not natural at all. It's just too in-your-face to work as a neutral tone for camouflage purposes.
Now the sword shall come from under the cloak.
-
Greg
- Urush bithî 'nKi ya-nam bawâb
- Posts: 4498
- Joined: Tue Dec 02, 2008 8:50 pm
- Location: Eriador; Central Indiana
Re: New Big Clothing Project!
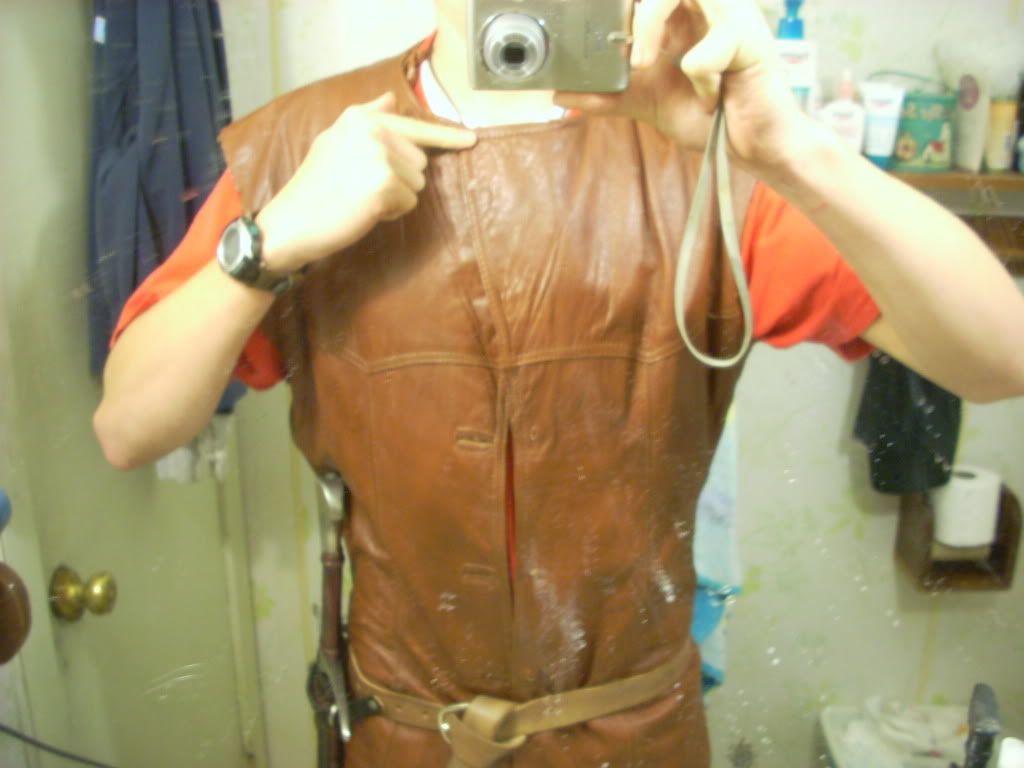
Okay, sports fans, it's time to work on fitting your jacket to you.
Disclaimer: I HATE self-taken photos in the mirror. Unfortunately, to properly show the jacket in its entirety, and to take these photos while holding parts of the jacket in place with one of my hands, I was forced to stoop to such poor levels of photography. I apologize in advance.
Moving on...
Here's the jacket on me, sans belt, sans sleeves, sans collar, sans, well...just about everything they added onto it.
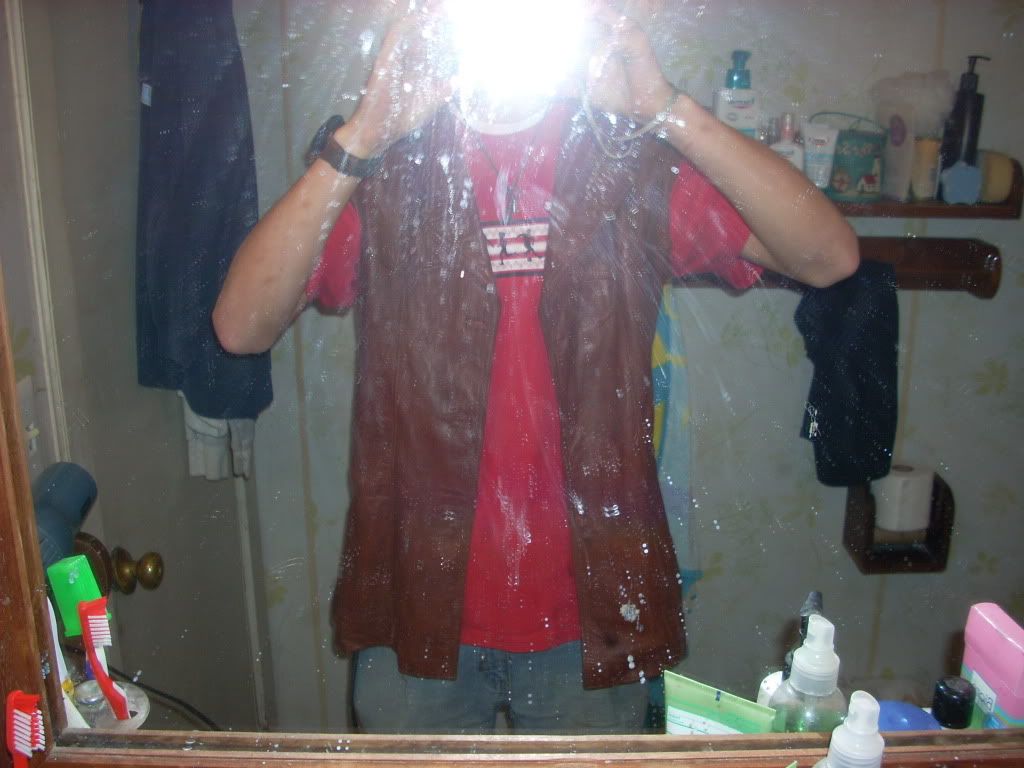
If you're doing this along with me, you'll want to put on a belt (only if you're planning on wearing it OVER the jacket) so we can see where it's all going to sit in the final product.
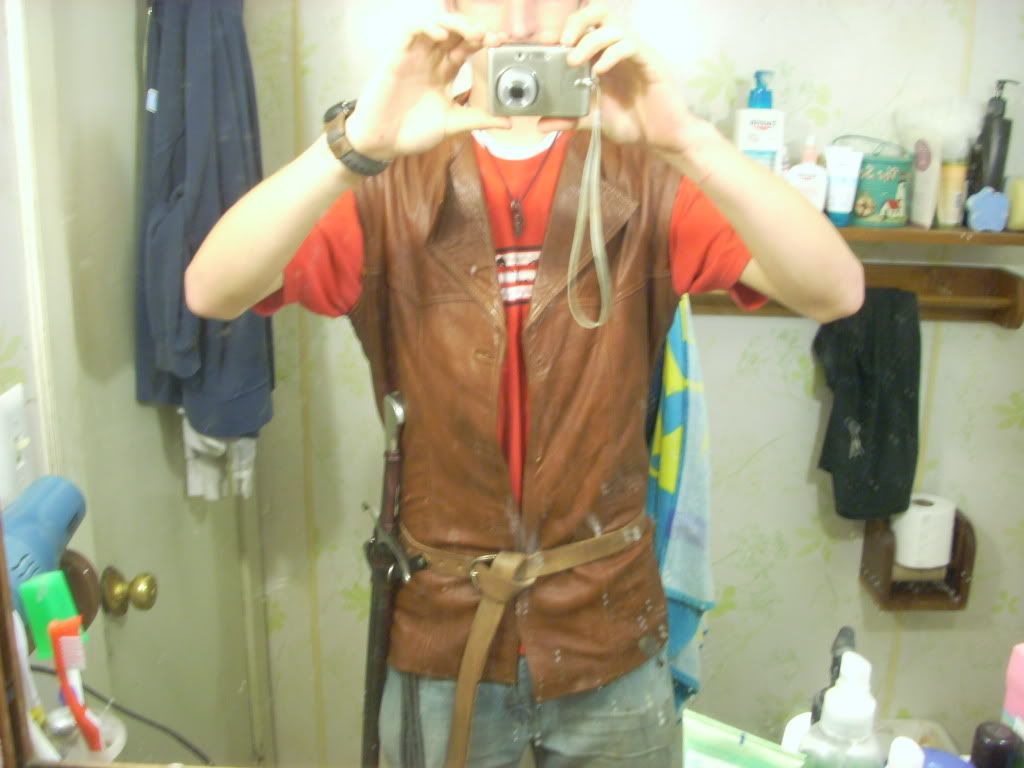
Now that my belt's on, take a look at the collar. Those dorky triangular flaps look pretty chic in 2010, perhaps, but in March of 3019, a Ranger wouldn't be caught dead charging the fields of Pelennor with a Tuxedo cut, now, would they? Honestly, they don't look all that bad...but I don't want them there, so for my purposes, please tolerate my humor.
So what I'm going to do is fold one of them in underneath the other, like so:
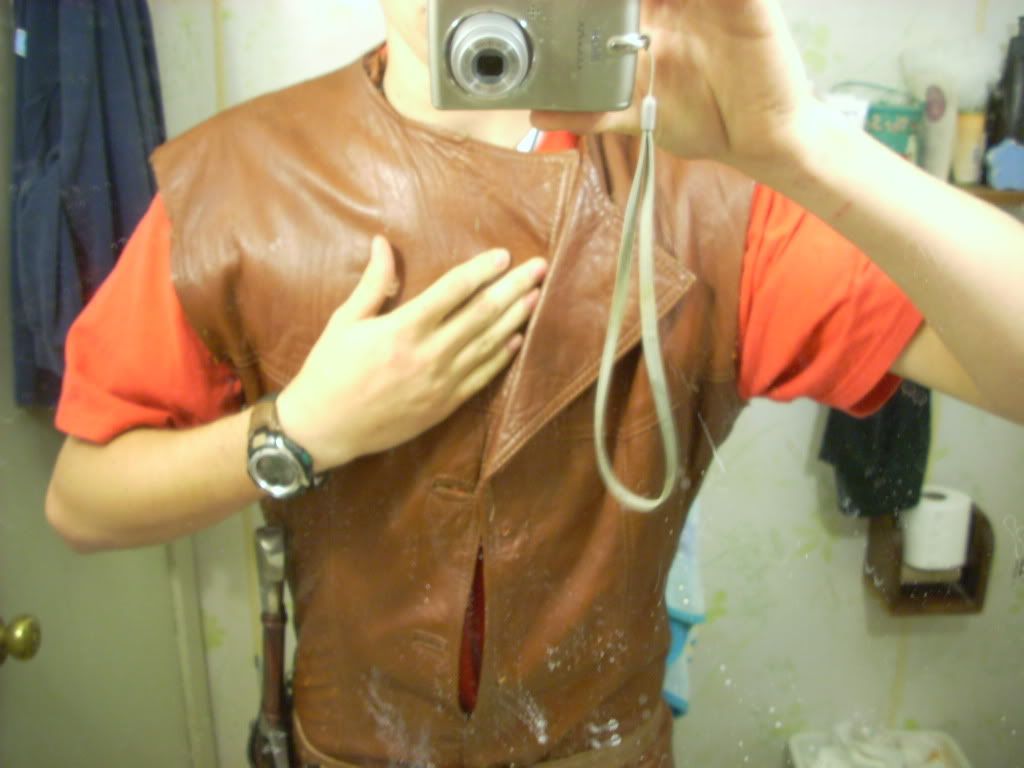
Now we have a jacket that's closed in the front, and set up for stitching or lacing up the front. I'm thinking I'll lace up the sides for adjustability, and permanently stitch up the front. The real question is, do I stitch it straight up the front and cut off the triangular flap completely, or do I stitch along the line of the flap. I kinda like the overlap, so I'm thinking I'll stitch along that line.
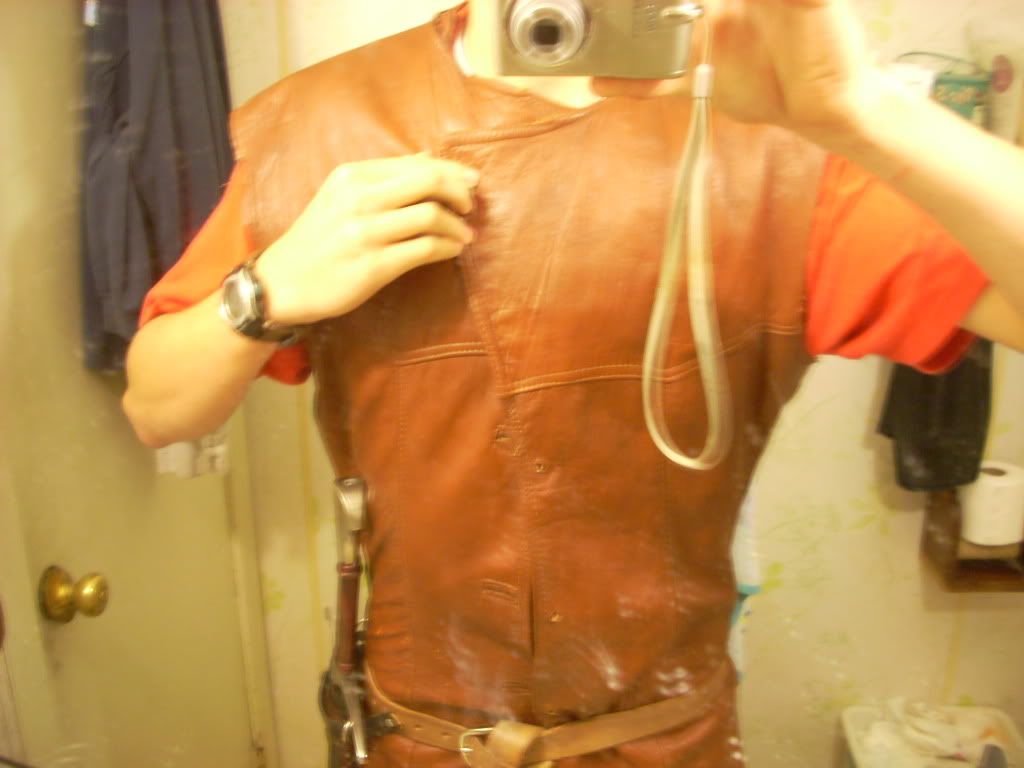
This is the point of no return; the next step is to start stitching things, so if your jacket doesn't fit you in any way at any point, you need to pin it now so that the alterations are made. Mine fits me pretty much perfectly at this point, fitting slightly loosely across my chest and torso with only t-shirts on, so it should fit perfectly when my wool shirt's on underneath. Make sure you put it on over whatever you'll be wearing in the field to ensure it'll fit. I want mine fairly taut across my chest, so I've pinned the sides to bring it to this:
Note the location of the flap; it's up at the collar. In the previous photo, I wasn't holding it in the right place, so the stitching across the chest wasn't lining up; make sure if you stitch anything permanently, that pre-existing stitches line up, or your jacket'll sit funny.
The biggest problem I'm having with this right now is figuring out how to cover up/remove those massive annoying buttonholes. I'd sew a patch over them out of the sleeves, but I'm thinking of making the sleeves lace on for colder weather, and if I don't, I wanna make some new gloves. Willrett, I tried using one of the sleeves to make a quiver, and it just didn't work out. The leather's too flexible; it'd be a royal pain trying to put arrows back into an empty one. Sorry about that.
Disclaimer: I HATE self-taken photos in the mirror. Unfortunately, to properly show the jacket in its entirety, and to take these photos while holding parts of the jacket in place with one of my hands, I was forced to stoop to such poor levels of photography. I apologize in advance.
Moving on...
Here's the jacket on me, sans belt, sans sleeves, sans collar, sans, well...just about everything they added onto it.
If you're doing this along with me, you'll want to put on a belt (only if you're planning on wearing it OVER the jacket) so we can see where it's all going to sit in the final product.
Now that my belt's on, take a look at the collar. Those dorky triangular flaps look pretty chic in 2010, perhaps, but in March of 3019, a Ranger wouldn't be caught dead charging the fields of Pelennor with a Tuxedo cut, now, would they? Honestly, they don't look all that bad...but I don't want them there, so for my purposes, please tolerate my humor.
So what I'm going to do is fold one of them in underneath the other, like so:
Now we have a jacket that's closed in the front, and set up for stitching or lacing up the front. I'm thinking I'll lace up the sides for adjustability, and permanently stitch up the front. The real question is, do I stitch it straight up the front and cut off the triangular flap completely, or do I stitch along the line of the flap. I kinda like the overlap, so I'm thinking I'll stitch along that line.
This is the point of no return; the next step is to start stitching things, so if your jacket doesn't fit you in any way at any point, you need to pin it now so that the alterations are made. Mine fits me pretty much perfectly at this point, fitting slightly loosely across my chest and torso with only t-shirts on, so it should fit perfectly when my wool shirt's on underneath. Make sure you put it on over whatever you'll be wearing in the field to ensure it'll fit. I want mine fairly taut across my chest, so I've pinned the sides to bring it to this:
Note the location of the flap; it's up at the collar. In the previous photo, I wasn't holding it in the right place, so the stitching across the chest wasn't lining up; make sure if you stitch anything permanently, that pre-existing stitches line up, or your jacket'll sit funny.
The biggest problem I'm having with this right now is figuring out how to cover up/remove those massive annoying buttonholes. I'd sew a patch over them out of the sleeves, but I'm thinking of making the sleeves lace on for colder weather, and if I don't, I wanna make some new gloves. Willrett, I tried using one of the sleeves to make a quiver, and it just didn't work out. The leather's too flexible; it'd be a royal pain trying to put arrows back into an empty one. Sorry about that.
Now the sword shall come from under the cloak.
-
David

- Silent Watcher over the Peaceful Lands
- Posts: 156
- Joined: Thu Jun 25, 2009 12:33 am
- Location: San Diego, CA
- Contact:
Re: New Big Clothing Project!
Looking good my friend, looking good. It'll look even better with a tunic underneath it. 

You will live by the sword and you will serve your brother. -Genesis 27:40
Re: New Big Clothing Project!
Hey no problem, use it as you need it, I will just have save alittle more to get my quiver.
"Knowledge is a weapon. I intend to be formidably armed." Richard, the Seeker (Sword of Truth)"
-
Greg
- Urush bithî 'nKi ya-nam bawâb
- Posts: 4498
- Joined: Tue Dec 02, 2008 8:50 pm
- Location: Eriador; Central Indiana
Re: New Big Clothing Project!
OR...you could enter Pete's writing contest...*wink wink*Willrett wrote:I will just have save alittle more to get my quiver.
Pics coming shortly. Finished stitching the front today so it's wearable as a pullover for the time being, but can't find my tunic now. Dag nabbit, living at two places sucks.David wrote:It'll look even better with a tunic underneath it.
Now the sword shall come from under the cloak.
Re: New Big Clothing Project!
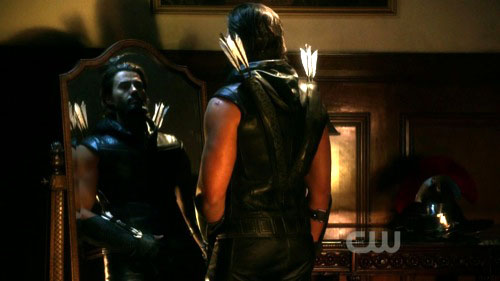
Not sure If anyone here watches smallville but this could make a very interesting project if it can be done to work correctly.
http://fandomania.com/wp-content/upload ... e910-4.jpg
http://fandomania.com/wp-content/upload ... e910-4.jpg
"Knowledge is a weapon. I intend to be formidably armed." Richard, the Seeker (Sword of Truth)"
-
Greg
- Urush bithî 'nKi ya-nam bawâb
- Posts: 4498
- Joined: Tue Dec 02, 2008 8:50 pm
- Location: Eriador; Central Indiana
Re: New Big Clothing Project!
They look cool from a "Green Arrow" perspective, but the usefulness has its limits. Since one uses one hand to hold the bow and one hand to draw arrows, having them on both sides would be counter-productive. It's cute, but I'd much rather have a larger quiver to hold all my arrows than some smaller, perhaps more "mobile" quivers on each side, making drawing awkward on one side. For that matter, having arrows sticking up over both shoulders would make moving through brush without snags the equivalent of attempting to be stealthy with a Samurai War Banner strapped to your back.
HOWEVER...if one were to, say, take a short sword or a curved knife and make a scabbard for that over one shoulder, with a matched quiver over the other shoulder, that'd be pretty sweet. The only problem would be re-sheathing said sword/dagger. Re-sheathing over the back is a bit of a pain.
HOWEVER...if one were to, say, take a short sword or a curved knife and make a scabbard for that over one shoulder, with a matched quiver over the other shoulder, that'd be pretty sweet. The only problem would be re-sheathing said sword/dagger. Re-sheathing over the back is a bit of a pain.
Now the sword shall come from under the cloak.