A quick leather project for those of you with some small craft size pieces of 2-3 oz leather laying around.
As Andy pointed out when the first discussion of water carrying devices occured on the Meranger site. The hobbits carried their water in bottles, one would assume they were leather covered to reduce the likelyhood of damage so here goes.
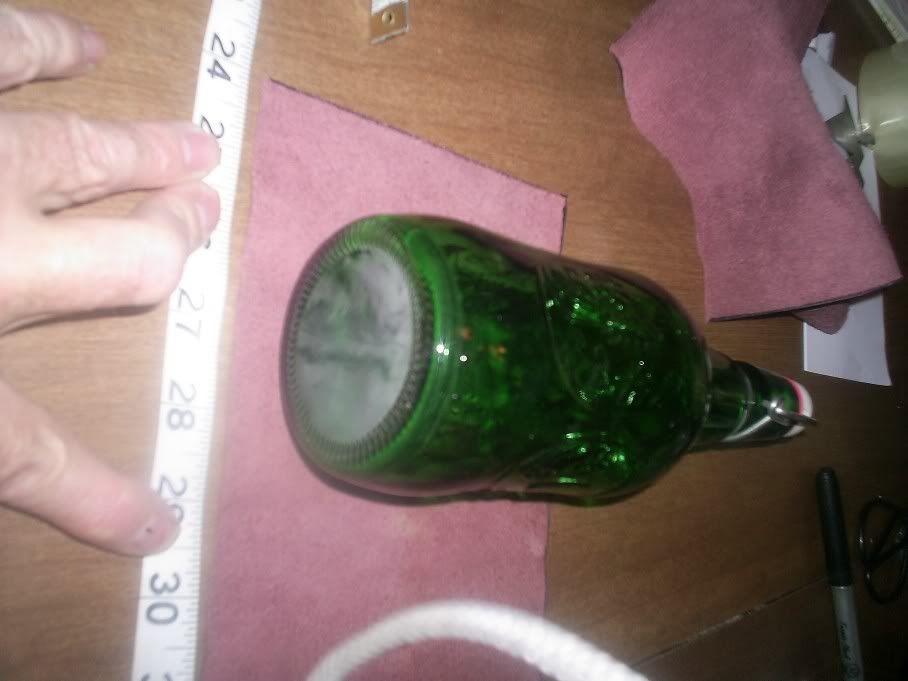
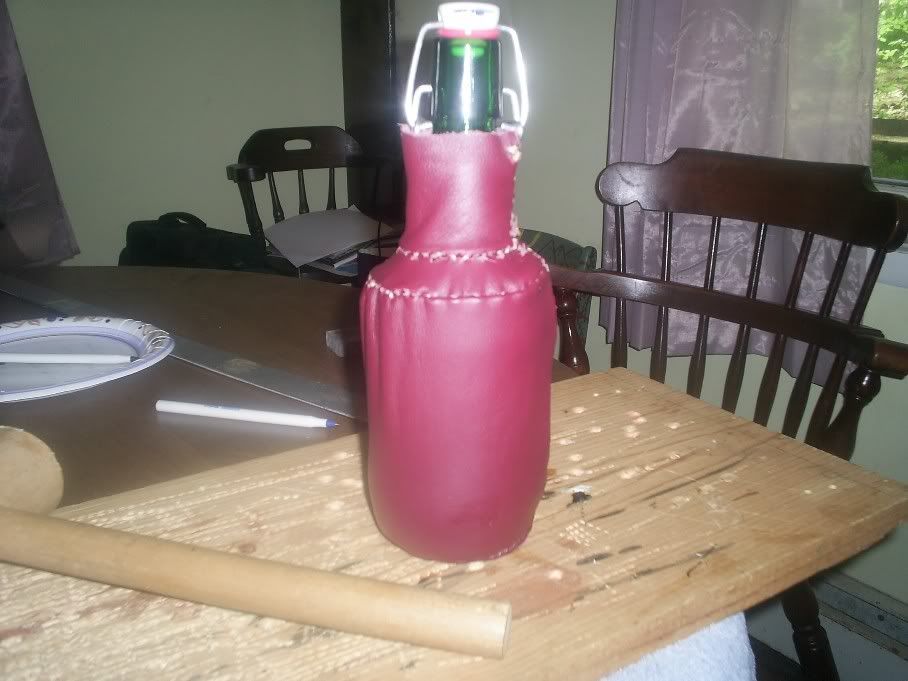
The bottle pictured is an old Grolsch beer bottle but the same procedure will work with just about any glass or clay bottle.
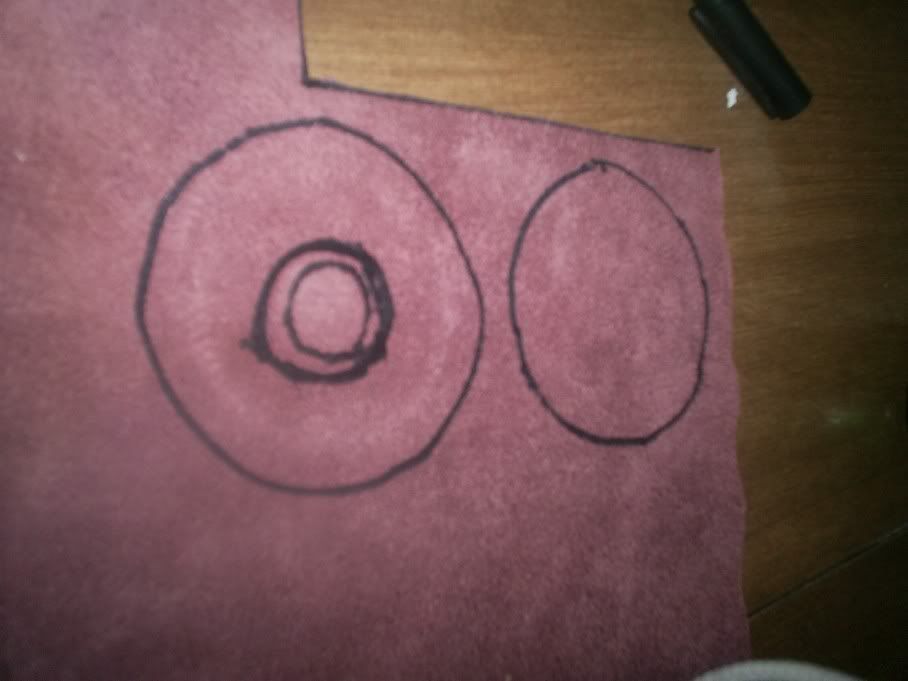
Take your bottle and stand it up on your leather, make two tracings of the bottom of the bottle. Allow about a 1/4" between the line and the actual bottle. This can be done very easily by putting your pen or marker vertically flush with the side of the bottle and just run it around the bottle.
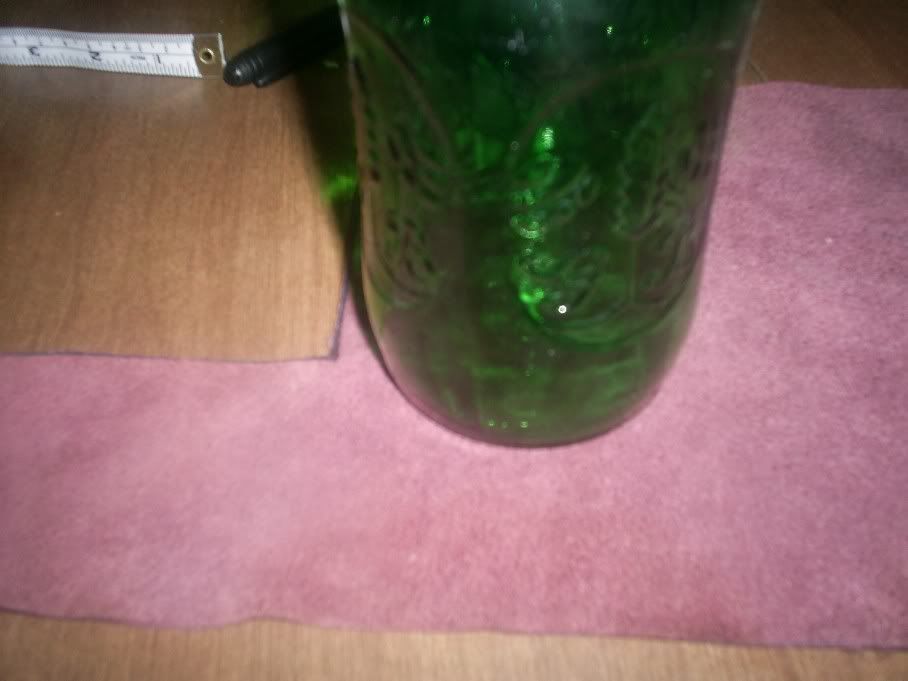
Take a measurement of the straight part of the bottle (before it begins to taper)and add 1/2". That will leave you a 1/4" on both top and bottom extra for the stitching. Measure the rest of the top of the bottle and add 1/4".
The next measurements are the circumference of the bottle at it's widest and at the top and add a 1/2" (1/4 for each of the overlapping edges). If your bottle has a slow taper you should measure this at the bottom of the taper.
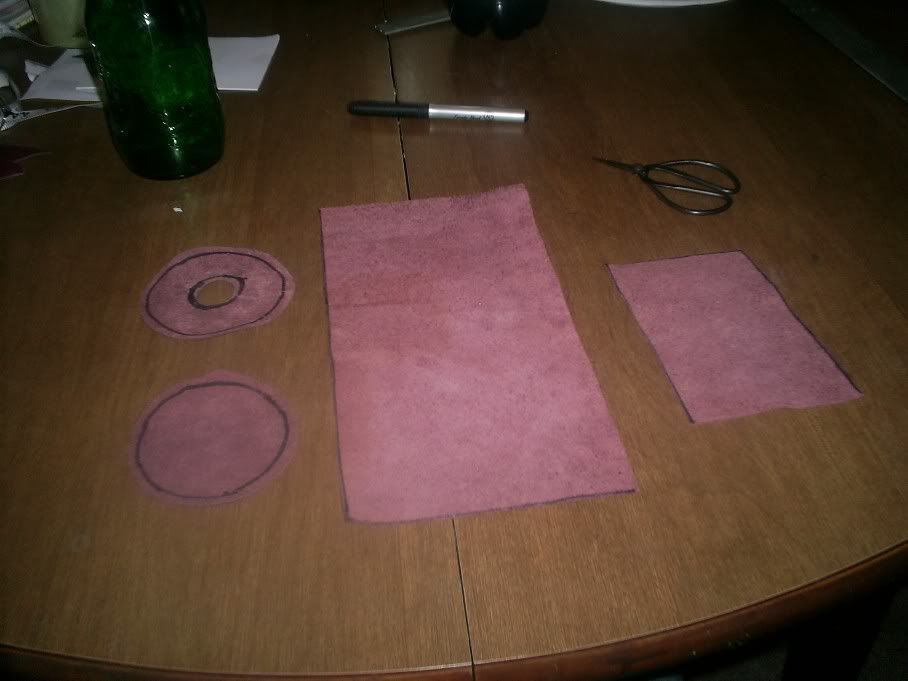
Transpose the measurements to your leather and cut out all four pieces. You will now have the two round pieces and 2 rectangular pieces. Cut out the center of one of the cirular pieces to approximately match the stem of your bottle at it's base.
Punch out your stitching hole and sew all four pieces together. Stitching them inside out is easier then rightside out. You may have to double up on some of the stitches as the pieces will not line up exactly. Leave the top to bottom vertical stitch till last.
Turn your covering rightside out and place on the bottle. Stitch up the vertical holes and your done.
You can add a leather handle or strap to yours or to make it more shock resistant add a layer of synthetic or actual sheepskin underneather the covering. Make sure you take any under layer into account on your measurements before cutting your leather pieces.
This project will take about an hour to measure, cut and punch out the stitching holes and figure another hour to hand stitch, making it a perfect task while watching TV.
I'll have to add pics later
Hobbit's Water Bottle
-
Peter Remling

- Athel Dunedain
- Posts: 3746
- Joined: Sat Feb 16, 2008 4:20 am
-
Peter Remling
- Athel Dunedain
- Posts: 3746
- Joined: Sat Feb 16, 2008 4:20 am
Here are some pics
<a href="http://s301.photobucket.com/albums/nn46 ... ottle1.jpg" target="_blank"><img src="http://i301.photobucket.com/albums/nn46 ... ottle1.jpg" border="0" alt="Photobucket"></a>
<a href="http://s301.photobucket.com/albums/nn46 ... ottle2.jpg" target="_blank"><img src="http://i301.photobucket.com/albums/nn46 ... ottle2.jpg" border="0" alt="Photobucket"></a>
<a href="http://s301.photobucket.com/albums/nn46 ... ottle3.jpg" target="_blank"><img src="http://i301.photobucket.com/albums/nn46 ... ottle3.jpg" border="0" alt="Photobucket"></a>
<a href="http://s301.photobucket.com/albums/nn46 ... e4jpeg.jpg" target="_blank"><img src="http://i301.photobucket.com/albums/nn46 ... e4jpeg.jpg" border="0" alt="Photobucket"></a>
<a href="http://s301.photobucket.com/albums/nn46 ... ottle5.jpg" target="_blank"><img src="http://i301.photobucket.com/albums/nn46 ... ottle5.jpg" border="0" alt="Photobucket"></a>
-
mcapanelli

- Haeropada
- Posts: 757
- Joined: Sat Feb 16, 2008 1:48 pm
- Location: New York, New York
- Contact:


-
Peter Remling
- Athel Dunedain
- Posts: 3746
- Joined: Sat Feb 16, 2008 4:20 am
-
Peter Remling
- Athel Dunedain
- Posts: 3746
- Joined: Sat Feb 16, 2008 4:20 am
While I'm thinking of it, you can also easily take your old bota bottle and put a new look to it. Trace out on two pieces of leather either side of your bota bag. Leave a little extra room for expansion, when filled. Stitch both pieces together leaving about a 1/4 undone.
Take the bota bag and carefully cut the old stitching off , remove the bladder from it's original covering, insert it in your new covering and stitchup the remaining 1/4. Add carry strap and you're done. It's easy to make it match the rest of your gear.
If you'd prefer you can use an old cotton blanket instead of leather. This has an advantage as when you fill your bota, allow the outside covering to
get wet, as the water on the covering evaporates it will have a cooling effect on your water in the bladder, keeping your water cooler longer.
-
mcapanelli
- Haeropada
- Posts: 757
- Joined: Sat Feb 16, 2008 1:48 pm
- Location: New York, New York
- Contact:

Re: Hobbit's Water Bottle
This is a gross exercise in thread necromancy, but I couldn't resist.
This recent thread on MyArmoury (http://www.myarmoury.com/talk/viewtopic ... 893#199893) got me thinking about canteens and water skins, so I did some digging and found this thread buried way deep down. I know that the Romans often times used metal canteens, but that many cultures seem to have made water bottles from leather and boiled in wax. Has anyone here tried this? I imagine the wax imparts an "interesting" flavor to the water, but it looks like a neat project.
Here's a how-to I found: http://medren.forumotion.net/informatio ... le-t61.htm
And some examples of what another crafter's look like: http://crafts.probetech.co.uk/darkage.html
-
Mirimaran

- Thangailhir
- Posts: 2110
- Joined: Tue Jul 01, 2008 5:38 pm
- Location: North Carolina
- Contact:
Re: Hobbit's Water Bottle
Great tutorial, Pete!
Since you mentioned the canvas or cloth cover, I thought to post a couple of pics I had saved from the net for future projects. I have a leather bottle that I got last year from faire, but have yet not used it. I'd like to have one of the round ones as well.
 I think this is a Czech or Eastern bloc water bottle.
 Thought this was a neat design too.
Since you mentioned the canvas or cloth cover, I thought to post a couple of pics I had saved from the net for future projects. I have a leather bottle that I got last year from faire, but have yet not used it. I'd like to have one of the round ones as well.
I think this is a Czech or Eastern bloc water bottle. Thought this was a neat design too."Well, what are you waiting for? I am an old man, and have no time for your falter! Come at me, if you will, for I do not sing songs of dastards!"
-
wulfgar

- Amrod Rhandir
- Posts: 431
- Joined: Mon Apr 05, 2010 2:53 am
- Location: Dardanelle, Arkansas
- Contact:
Re: Hobbit's Water Bottle
Here's a method for making a net bag around a glass or clay bottle, or a gourd. http://venetiancat.com/Net-Bag-How-To-Make.html
I have done a gourd like this and it is very effective. For more protection and strength than the jute twine in the demo, use the heavy hemp twine that you can get at Wal-Mart in the craft section.
I have done a gourd like this and it is very effective. For more protection and strength than the jute twine in the demo, use the heavy hemp twine that you can get at Wal-Mart in the craft section.
You can't take the sky from me.
-
Peter Remling
- Athel Dunedain
- Posts: 3746
- Joined: Sat Feb 16, 2008 4:20 am
Re: Hobbit's Water Bottle
Now there's a co-inkidink, I just rec'd this ( http://cgi.ebay.com/ws/eBayISAPI.dll?Vi ... K:MEWNX:IT ) in the mail today.
When I was at the RenFair a few weeks ago, I saw a vendor selling one of these with just straps for $60. I thought it would be cool to completely leather cover it so I grabbed the first one I saw on Ebay. I overpaid by about $10, they are significantly cheaper if you shop around. As soon as I get a chance to cover this one I'll post pics.
A lot of the Eastern Block countryies use the rounded canteen, but most are only about 1 liter to a quart.

Re: Hobbit's Water Bottle
Not a bad deal since walmart sells the regular size ones for 4 bucks. I have 2 and planned on covering them.
"Knowledge is a weapon. I intend to be formidably armed." Richard, the Seeker (Sword of Truth)"
Re: Hobbit's Water Bottle
I just came across this thread. This is definitely helpful. I hope to try this out one of these days. 
-
Kortoso

- Haeropada
- Posts: 822
- Joined: Fri Oct 03, 2014 9:37 pm
- Location: Chiang Mai, Thailand
- Contact:
Re: Hobbit's Water Bottle
Unfortunately, many of the links and pictures did not survive the ages.LegenGary wrote:I just came across this thread. This is definitely helpful. I hope to try this out one of these days.
I did add something to the Wiki:
http://www.middleearthrangers.org/wiki/ ... ter_bottle
If someone has something similar to add, this is the place to do so, I reckon.
There are no safe paths in this part of the world. Remember you are over the Edge of the Wild now, and in for all sorts of fun wherever you go.
-
Elleth

- êphal ki-*raznahê
- Posts: 2941
- Joined: Wed Nov 03, 2010 5:26 am
- Location: in the Angle; New England
Re: Hobbit's Water Bottle
Thank you Kortoso! I'm sure those to come will find that useful!
Persona: Aerlinneth, Dúnedain of Amon Lendel c. TA 3010.