My Kit (picture heavy)

A place for pics and tutorials on making Soft Kit (clothing and accessories like buckles and cloak pins).

Moderators: caedmon, Greg

User avatar
BrianGrubbs
Silent Watcher over the Peaceful Lands
Posts: 267
Joined: Tue Jan 24, 2012 12:59 pm
Location: Birmingham, Alabama
Contact:

My Kit (picture heavy)

Post by BrianGrubbs »

As requested (and promised) here are some pictures of my kit. Most of the things I use self made, with a few exceptions, and everything that I make I use while camping. I had someone approach me once and ask what weathering technique I used on my leather...my answer was "hard use."

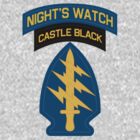
We'll start with the quiver. This was one of the first large scale leather projects that I made. i used a pattern that I bought from Tandy Leather, and modified slightly to pit my purposes. First off, I didn't put the outside pocket on that the pattern called for...in retrospect I wish that I had, and I will probably go back in the future and add one. Also I discovered that the strap pattern it apparently sized for a hobbit. I had to add over a foot of strap to get it around my chest. My final modifications were to lace some wool fabric around the top to help silence my arrows, and to add leather laces to the side so that I can hang my tarp of blanket on it while I'm trekking.

Image

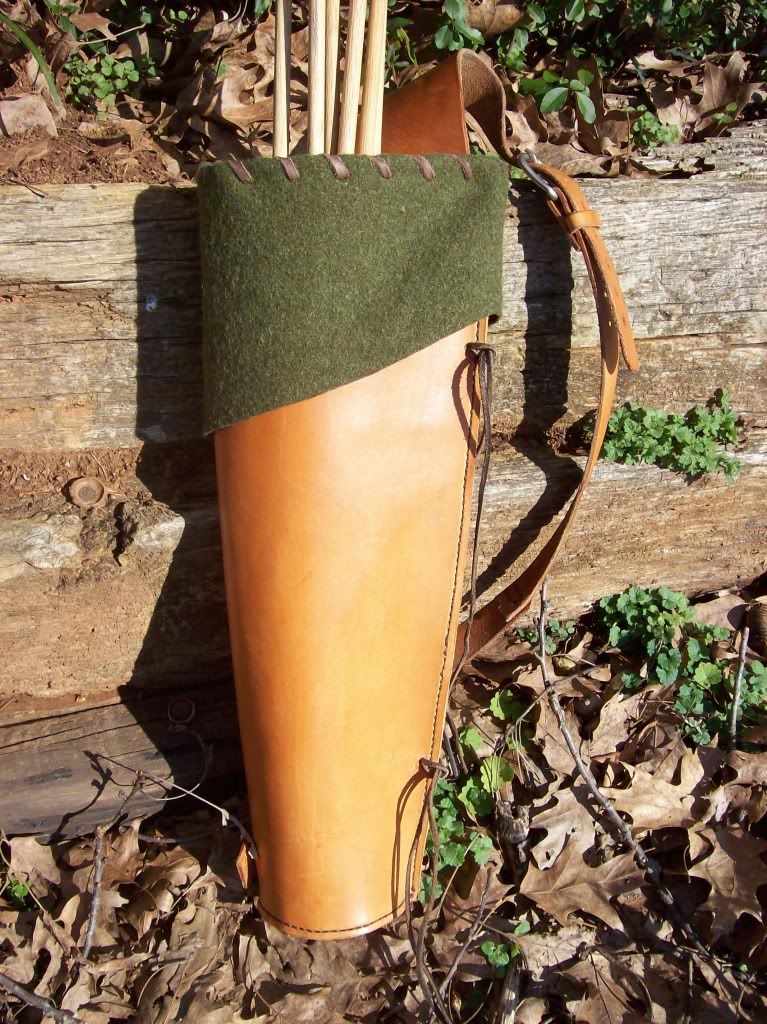
Next a look at my haversacks. I made this one first out of canvas.

Image

I did the leather shoulder strap with a sheath for a small knife on it, and I really liked the design, but the color didn't turn out the way I wanted. So I gave it to my wife, who liked it, and made a different one.
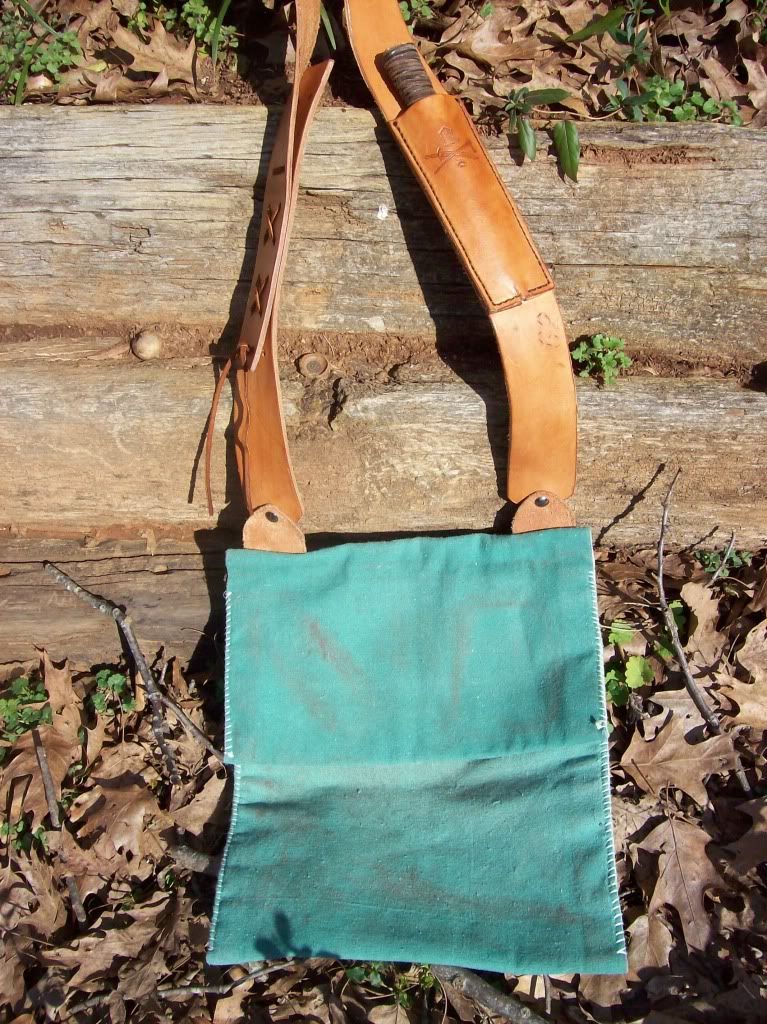
Oh yes, here's the inside of the flap showing the pockets, and the leather flap with buttons that keeps everything from falling out of said pockets.

Image

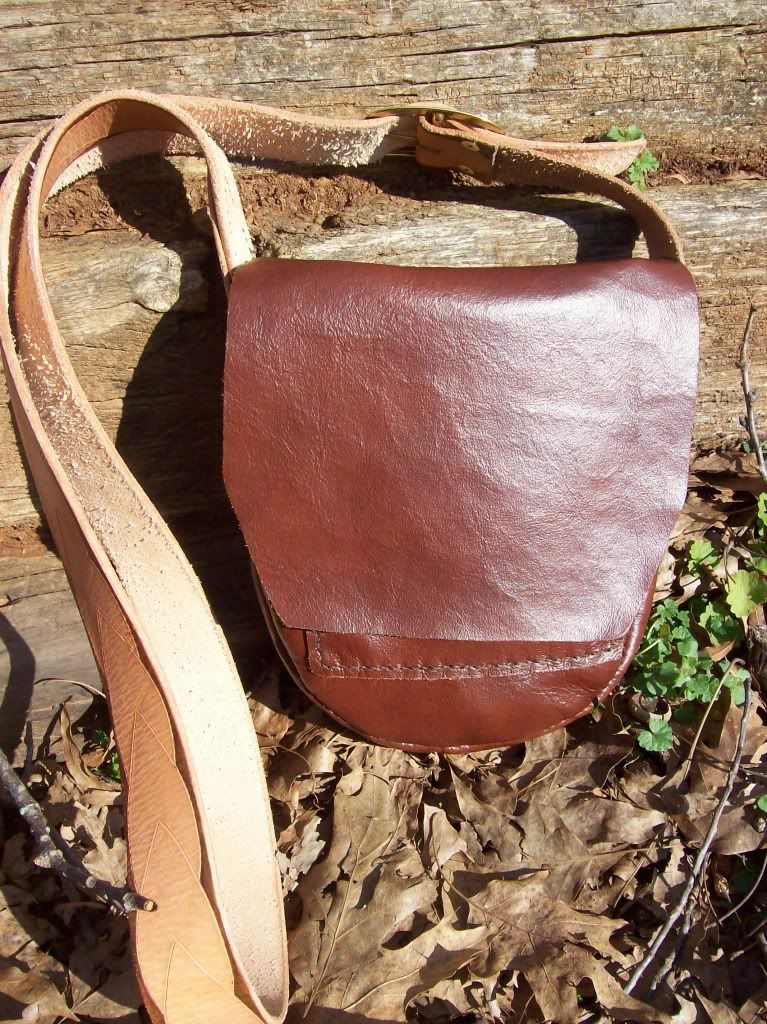
My next design was smaller, and made of leather. It is much more like a black powder shooter possibles bag than a haversack, but it is nice to have a smaller option for a shoulder bag sometimes. It has a pocket on the outside of the front, which you can see sticking out from under the flap. I carved leaves in the shoulder strap, since I wanted something a little more ornate that just a plain strap.

Image

Here is my belt that I wear. No matter what else I carry, this belt goes with me any time that I go into the woods. I carry all the necessities for survival in this belt, and at a later date I will go over all those things.

Image

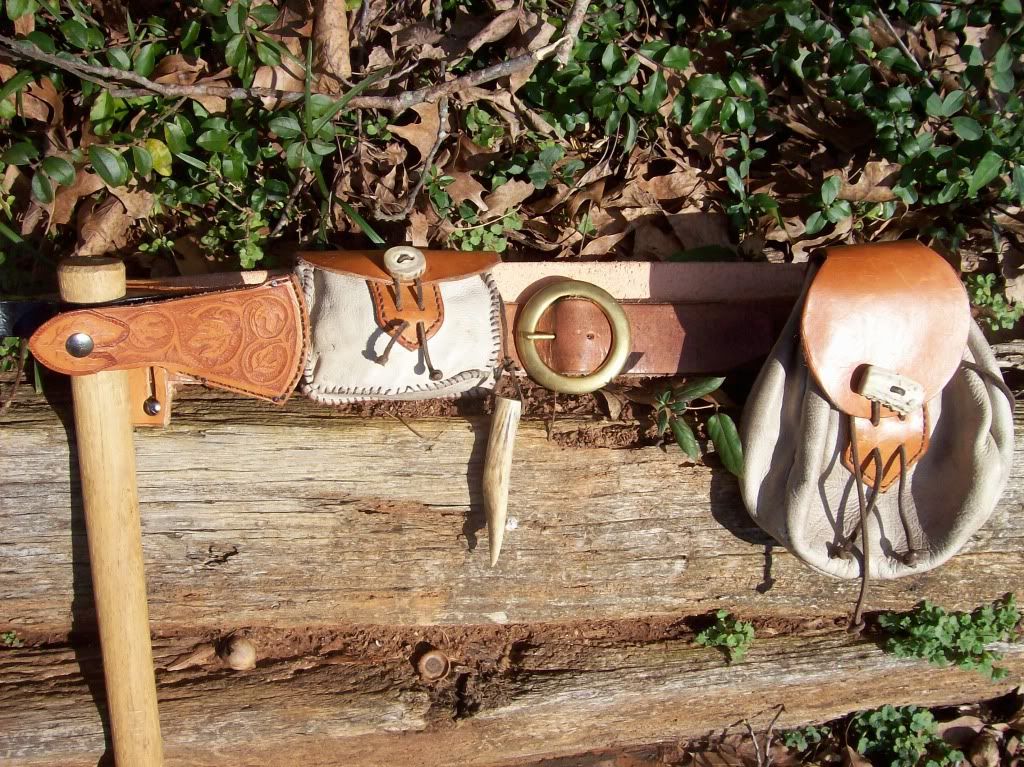
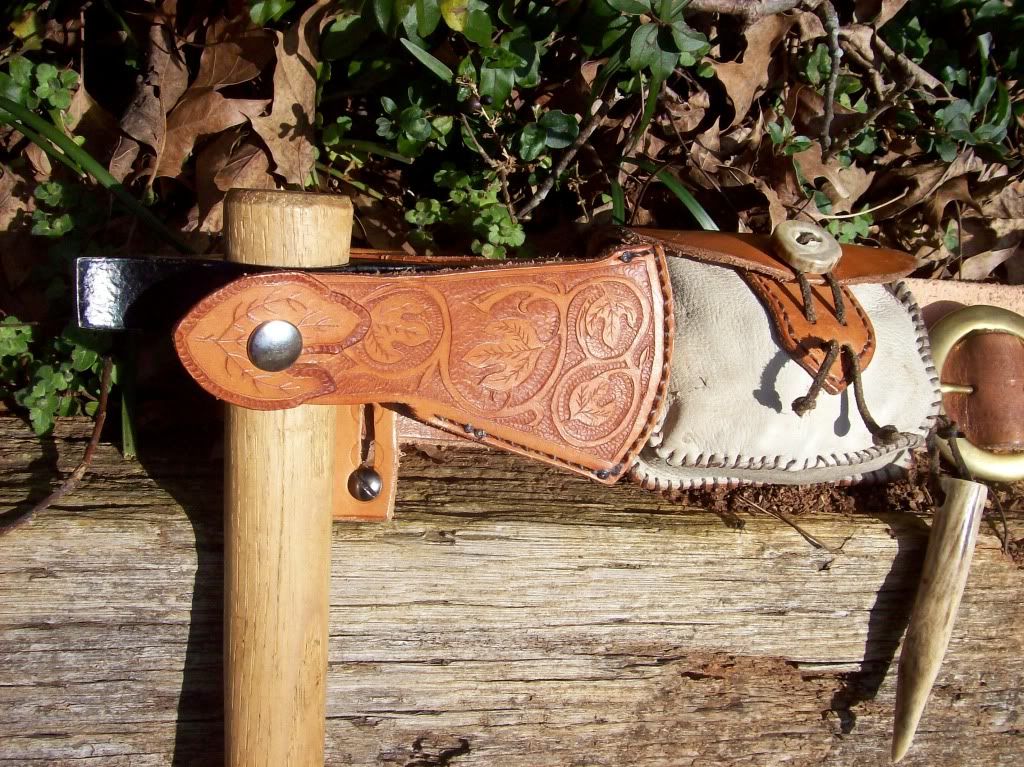
Here's a closeup of the tomahawk cover and the small pouch that I use for my flint and steel.

Image

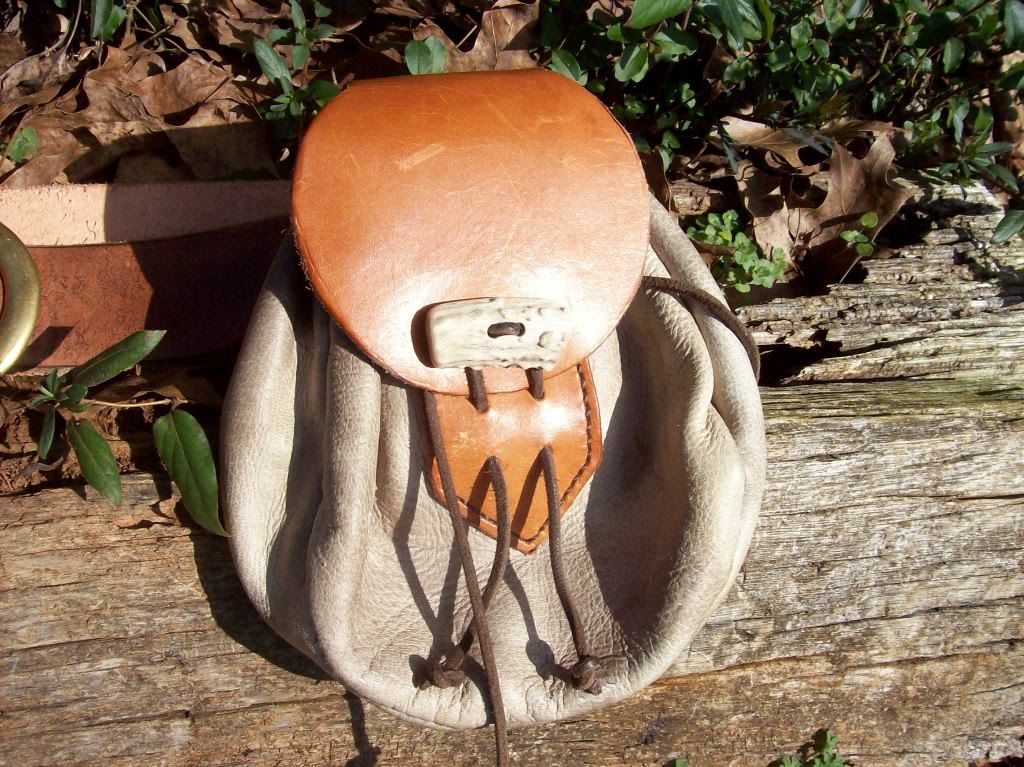
And this is my larger belt pouch (sporran).

Image

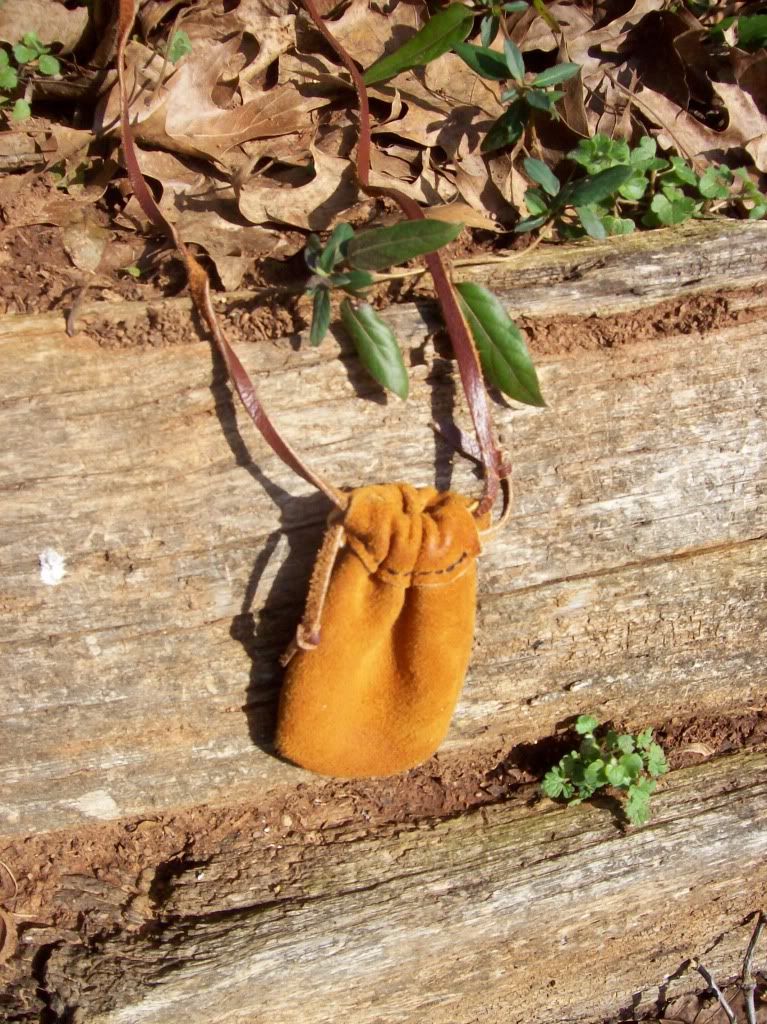
To round out my pouches, here's my small neck pouch. Good for coins at the faire, or herbs in the wild.

Image

Next in line is the Baldric that I made for my sword. The sword is a smaller version of the "Ranger" sword from LOTR, and in my opinion is a much better size for the style sword used by rangers. Of course it shouldn't have even existed in the movie...but I digress.

Image

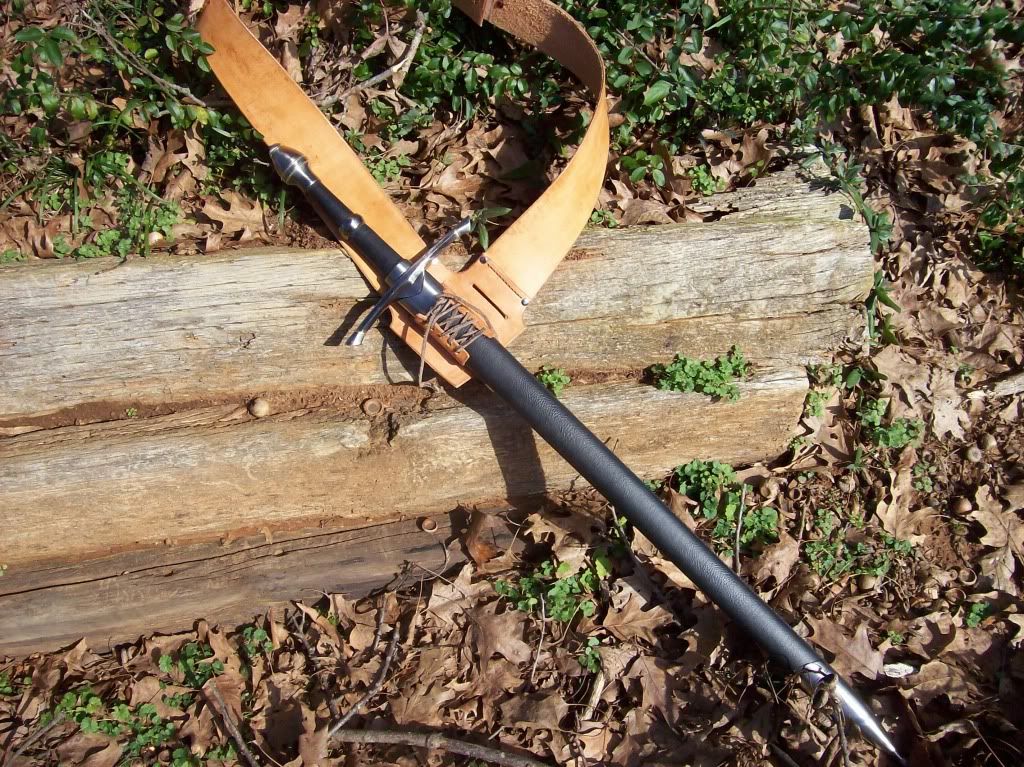
The baldric is designed to be reversible, so I can mount my tomahawk cover on it and wear it on the over side if I wish.

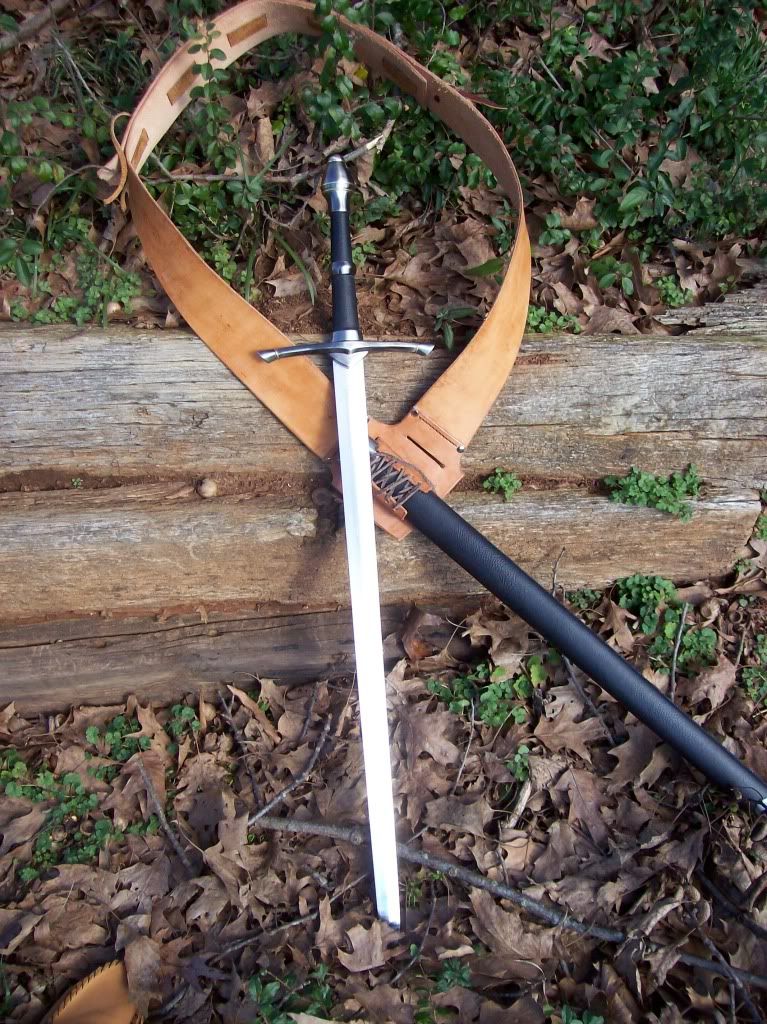
And a shot with the sword out.

Image

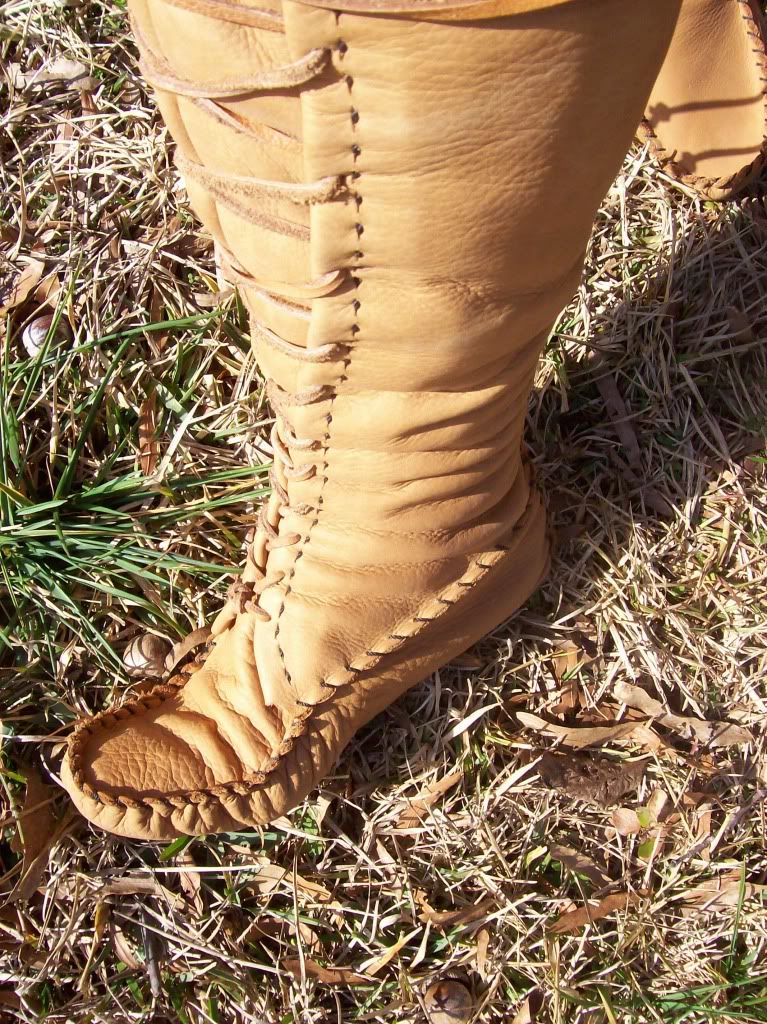
My footwear. These are what led me to this forum, as I was searching to see what other people had done with the Tandy plainsman boot patters, and someone here had made a set (can't remember who...but you know who you are, and thank you). Similar to those. I stiched my boots with heavy thread rather than latigo lace. I like the way they turned out.

Image

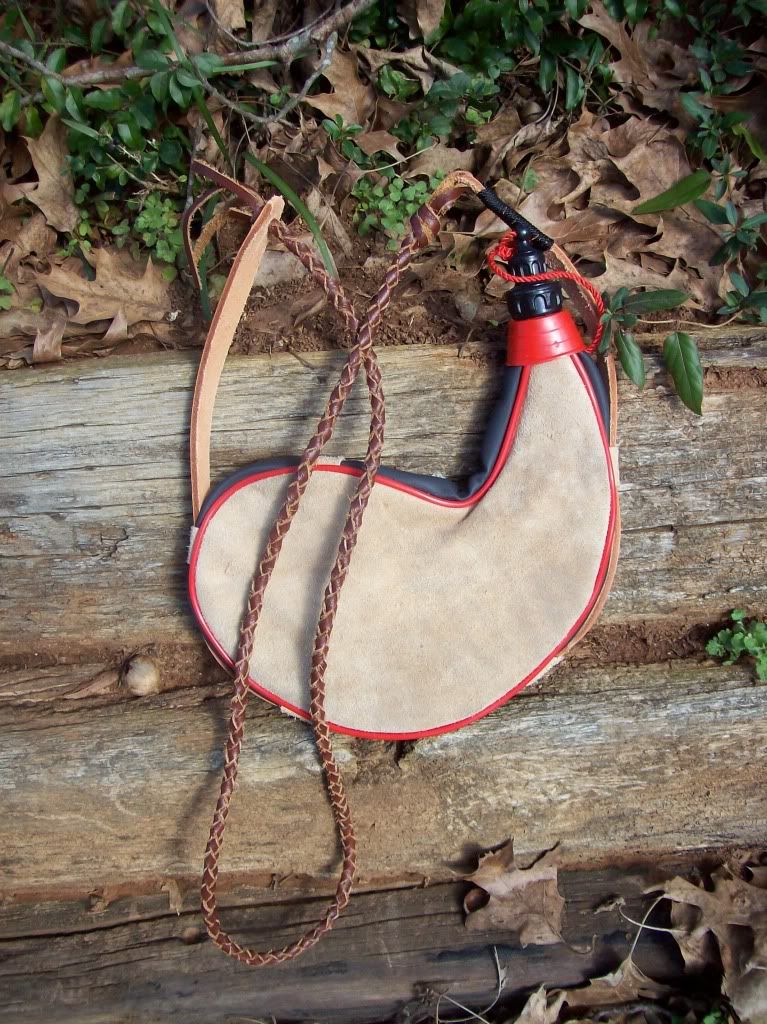
Lastly we have a work in progress. This is my waterskin, that I have yet to make a cover for. I did the braided shoulder strap first, just so that I could carry it, and I will in the future cover all the red plastic up with leather.

Image

Well, I think that's about all without going into weapons. As I get more stuff made I will update this thread, and I will also post on the contents of my pouches later. Thanks for looking!

Brian
The only thing necessary for the triumph of evil is for good men to do nothing.
User avatar
Manveruon
Thangailhir
Posts: 2582
Joined: Tue Nov 15, 2011 6:11 am
Location: Littleton, CO
Contact:

Re: My Kit (picture heavy)

Post by Manveruon »

Very nicely done! I love the tomahawk cover! It's obvious a lot of time, effort, and care went into your kit!

Also, as a side note, can you give an idea of how you did the round braid for the strap on your waterskin? I've never been able to figure that out, myself.
Maerondir Perianseron, also called “Mickel,” Halfling Friend - Ranger of the Misty Mountains
User avatar
BrianGrubbs
Silent Watcher over the Peaceful Lands
Posts: 267
Joined: Tue Jan 24, 2012 12:59 pm
Location: Birmingham, Alabama
Contact:

Re: My Kit (picture heavy)

Post by BrianGrubbs »

Manveruon wrote: Also, as a side note, can you give an idea of how you did the round braid for the strap on your waterskin? I've never been able to figure that out, myself.
It's not terribly difficult. There are several decent tutorials online such as this one http://www.carbidecamps.net/CombinedAct ... /round.htm The key for me was using flat straps and making sure that I never got a twist in them. Once you finish the braid, take the whole thing and roll it between your hands, this helps round it out.

Hope that helps!

Brian
The only thing necessary for the triumph of evil is for good men to do nothing.
User avatar
Greg
Urush bithî 'nKi ya-nam bawâb
Posts: 4496
Joined: Tue Dec 02, 2008 8:50 pm
Location: Eriador; Central Indiana

Re: My Kit (picture heavy)

Post by Greg »

Eric C is the gentleman who wears a pair of those.

Nice stuff!
Now the sword shall come from under the cloak.
User avatar
Willrett
Thangailhir
Posts: 1331
Joined: Tue Jun 02, 2009 8:36 pm
Location: Short Gap, WV

Re: My Kit (picture heavy)

Post by Willrett »

great pics. love the sword and I'm very interested in your finished bota since I have a couple of those same ones.
"Knowledge is a weapon. I intend to be formidably armed." Richard, the Seeker (Sword of Truth)"
User avatar
Jonathan B.
Amrod Rhandir
Posts: 448
Joined: Sat Oct 02, 2010 9:57 pm
Location: South Florida
Contact:

Re: My Kit (picture heavy)

Post by Jonathan B. »

Great stuff.
User avatar
Mirimaran
Thangailhir
Posts: 2110
Joined: Tue Jul 01, 2008 5:38 pm
Location: North Carolina
Contact:

Re: My Kit (picture heavy)

Post by Mirimaran »

Very nice! Great kit, Ranger!

Ken
"Well, what are you waiting for? I am an old man, and have no time for your falter! Come at me, if you will, for I do not sing songs of dastards!"
User avatar
Kiriana
Haeropada
Posts: 769
Joined: Thu Aug 26, 2010 1:02 am
Location: Lugoff, SC
Contact:

Re: My Kit (picture heavy)

Post by Kiriana »

Oh wow a very very nice kit.
“From the ashes a fire shall be woken, A light from the shadows shall spring; Renewed shall be blade that was broken, The crownless again shall be king.”

http://www.mackermakkeep.com
kaelln

Re: My Kit (picture heavy)

Post by kaelln »

Beautiful stuff! I especially love the tomahawk cover.
Jon
Amrod Rhandir
Posts: 646
Joined: Mon Jun 21, 2010 11:52 am
Location: Cumbria

Re: My Kit (picture heavy)

Post by Jon »

Excellent kit! I love it!

How did you do the patterns on the leather? I've had a go using both a soldering iron and an engraver but not to much success...

Life before Death.
Strength before Weakness.
Journey before Destination.
User avatar
Ringulf
Naugothrain
Posts: 2413
Joined: Sat Jul 09, 2011 1:50 pm
Location: Central Florida
Contact:

Re: My Kit (picture heavy)

Post by Ringulf »

Brian,
On your belt you have an antler tip hanging down by the buckle, What is this used for, is it a whistle or tool, a decoration? I could see a lot of uses for something like that and it along with the rest of your kit is very handsome and woodsy. Your stitching is very nicely done and the tooling on the Hawk sheath is very fine. Is that your own design bearing native leaves?
I am Ringulf the Dwarven Woodsman, I craft leather, wood, metal, and clay,
I throw axes, seaxes, and pointy sticks, And I fire my bow through the day.
Come be my ally, lift up your mead! We'll search out our foes and the Eagles we'll feed! :mrgreen:
User avatar
BrianGrubbs
Silent Watcher over the Peaceful Lands
Posts: 267
Joined: Tue Jan 24, 2012 12:59 pm
Location: Birmingham, Alabama
Contact:

Re: My Kit (picture heavy)

Post by BrianGrubbs »

Ringulf wrote:Brian,
On your belt you have an antler tip hanging down by the buckle, What is this used for, is it a whistle or tool, a decoration? I could see a lot of uses for something like that and it along with the rest of your kit is very handsome and woodsy. Your stitching is very nicely done and the tooling on the Hawk sheath is very fine. Is that your own design bearing native leaves?
The antler tip is mainly for pressure flaking a new edge on my flint, but can also be used as an awl, and the hole in the end is great for directing your breath when you're blowing a fire back to life. The leaves on the hawk sheath are sassafras leaves, and yes it is my own design. I did the work with an old wood turning tool and a nail, back before I had actual leather carving tools.

Thanks everyone for the kind words! This kit has been a lot of fun to put together, and it's been used a lot 8)

Brian
The only thing necessary for the triumph of evil is for good men to do nothing.
User avatar
Fallsofdragon
Dúnadan
Posts: 64
Joined: Thu Jan 26, 2012 8:25 pm
Location: Misty Mountains, Oergon

Re: My Kit (picture heavy)

Post by Fallsofdragon »

"Hannon le ... Ranger Brian"
A most excellent kit, great pictures, you have done well Sir'
Thank You for sharing, I like every feature of each item, and
as total combined.
Paul/Falls

Image The Queen of Light took her bow and then she turned to go
The Prince of Peace embraced the gloom and walked the night alone
kaelln

Re: My Kit (picture heavy)

Post by kaelln »

Hey Dirhael, there is a brief tutorial on basic leather carving here:

http://www.youtube.com/watch?v=QynofyY2fL4

There are a bunch more on youtube as well.
User avatar
E.MacKermak
Amrod Rhandir
Posts: 512
Joined: Wed Dec 16, 2009 1:01 am
Location: Lugoff, SC
Contact:

Re: My Kit (picture heavy)

Post by E.MacKermak »

Very nice kit. I like the tooling on the 'hawk cover. Really shows what can be done with very simple tools.

The boots look like they came out pretty nice. I have the same pattern, but have not made them yet (I have to upsize the pattern to fit my size 13s).

Looking forward to seeing more from you.
Still round the corner there may wait a new road or a secret gate and though I oft have passed them by a day will come at last when I shall take the hidden paths that run west of the moon, east of the sun.
Post Reply